Pi Saber: an ECE 5725 Final Project
By Ruby Min (rbm244), Lauren Shen (ljs324), and Rachel Zhou (sz287)
5/18/2022
Project Objective:
Our objective was to implement a game similar to the popular Oculus game, Beat Saber on the Raspberry Pi 4. We wanted to make a fun and interactive game using the PiTFT, as well as other external hardware. The goal of the game is to slash through as many incoming blocks as possible in a specified direction in time with the music.
Demo Video:
Introduction
The final project is our own implementation of the popular virtual reality (VR) game, Beat Saber displayed on the PiTFT. In the original game, the player slashes through incoming blocks viewed in a headset by moving a controller through the air. Instead of a headset, and a VR system, we use a joystick, IMU, and PiTFT display screen. The blocks are marked with arrows indicating the direction in which they should be slashed. Each block appears so that they are slashed to the rhythm of the music. This project used both hardware and software components. We include hardware for user controls, as well as speakers for playing the music. In particular, we connected an inertial measurement unit (IMU) to calculate tilt to move the saber across the bottom of the screen. We also attached a joystick that helps determine whether there was a slashing motion and in which direction it occurred. For the display, we used the PiTFT that we have been using from the previous labs to display our game and collect touchscreen inputs for buttons such as starting the game, pausing, etc. We connected speakers to the auxiliary output of the Raspberry Pi to play music out loud. On the software side, we developed our game using PyGame, which has advanced graphics capabilities. We use the object oriented features of Python to create block and cursor classes to make it easier to generate blocks for the player to slash as well as move around the player sprite. We also use the application, mplayer for playing music. Our project is an embedded system since it receives live inputs and makes real-time changes in response to them.
Design and Testing
Game States
As a base for our entire game structure, we have a basic state machine with START, SELECT, RUNNING, PAUSE, and DONE states. The START state includes the start screen and start button. The SELECT state allows the user to choose what song to play. In the RUNNING state, the game is in motion, and the player tries to slash blocks. In the PAUSE state, the gameplay stops and the player has the option to resume or quit the game. Lastly, the DONE state occurs when the song has finished playing, the player sees their score, and they can restart the game. In each state, we display text and a different set of buttons which trigger state transitions. For each state, we maintain a dictionary of buttons, whose key is the button text, and we iterate through this dictionary to display all of the buttons for that state. We also iterate through this dictionary when detecting mouse touch collisions to determine which button was clicked.
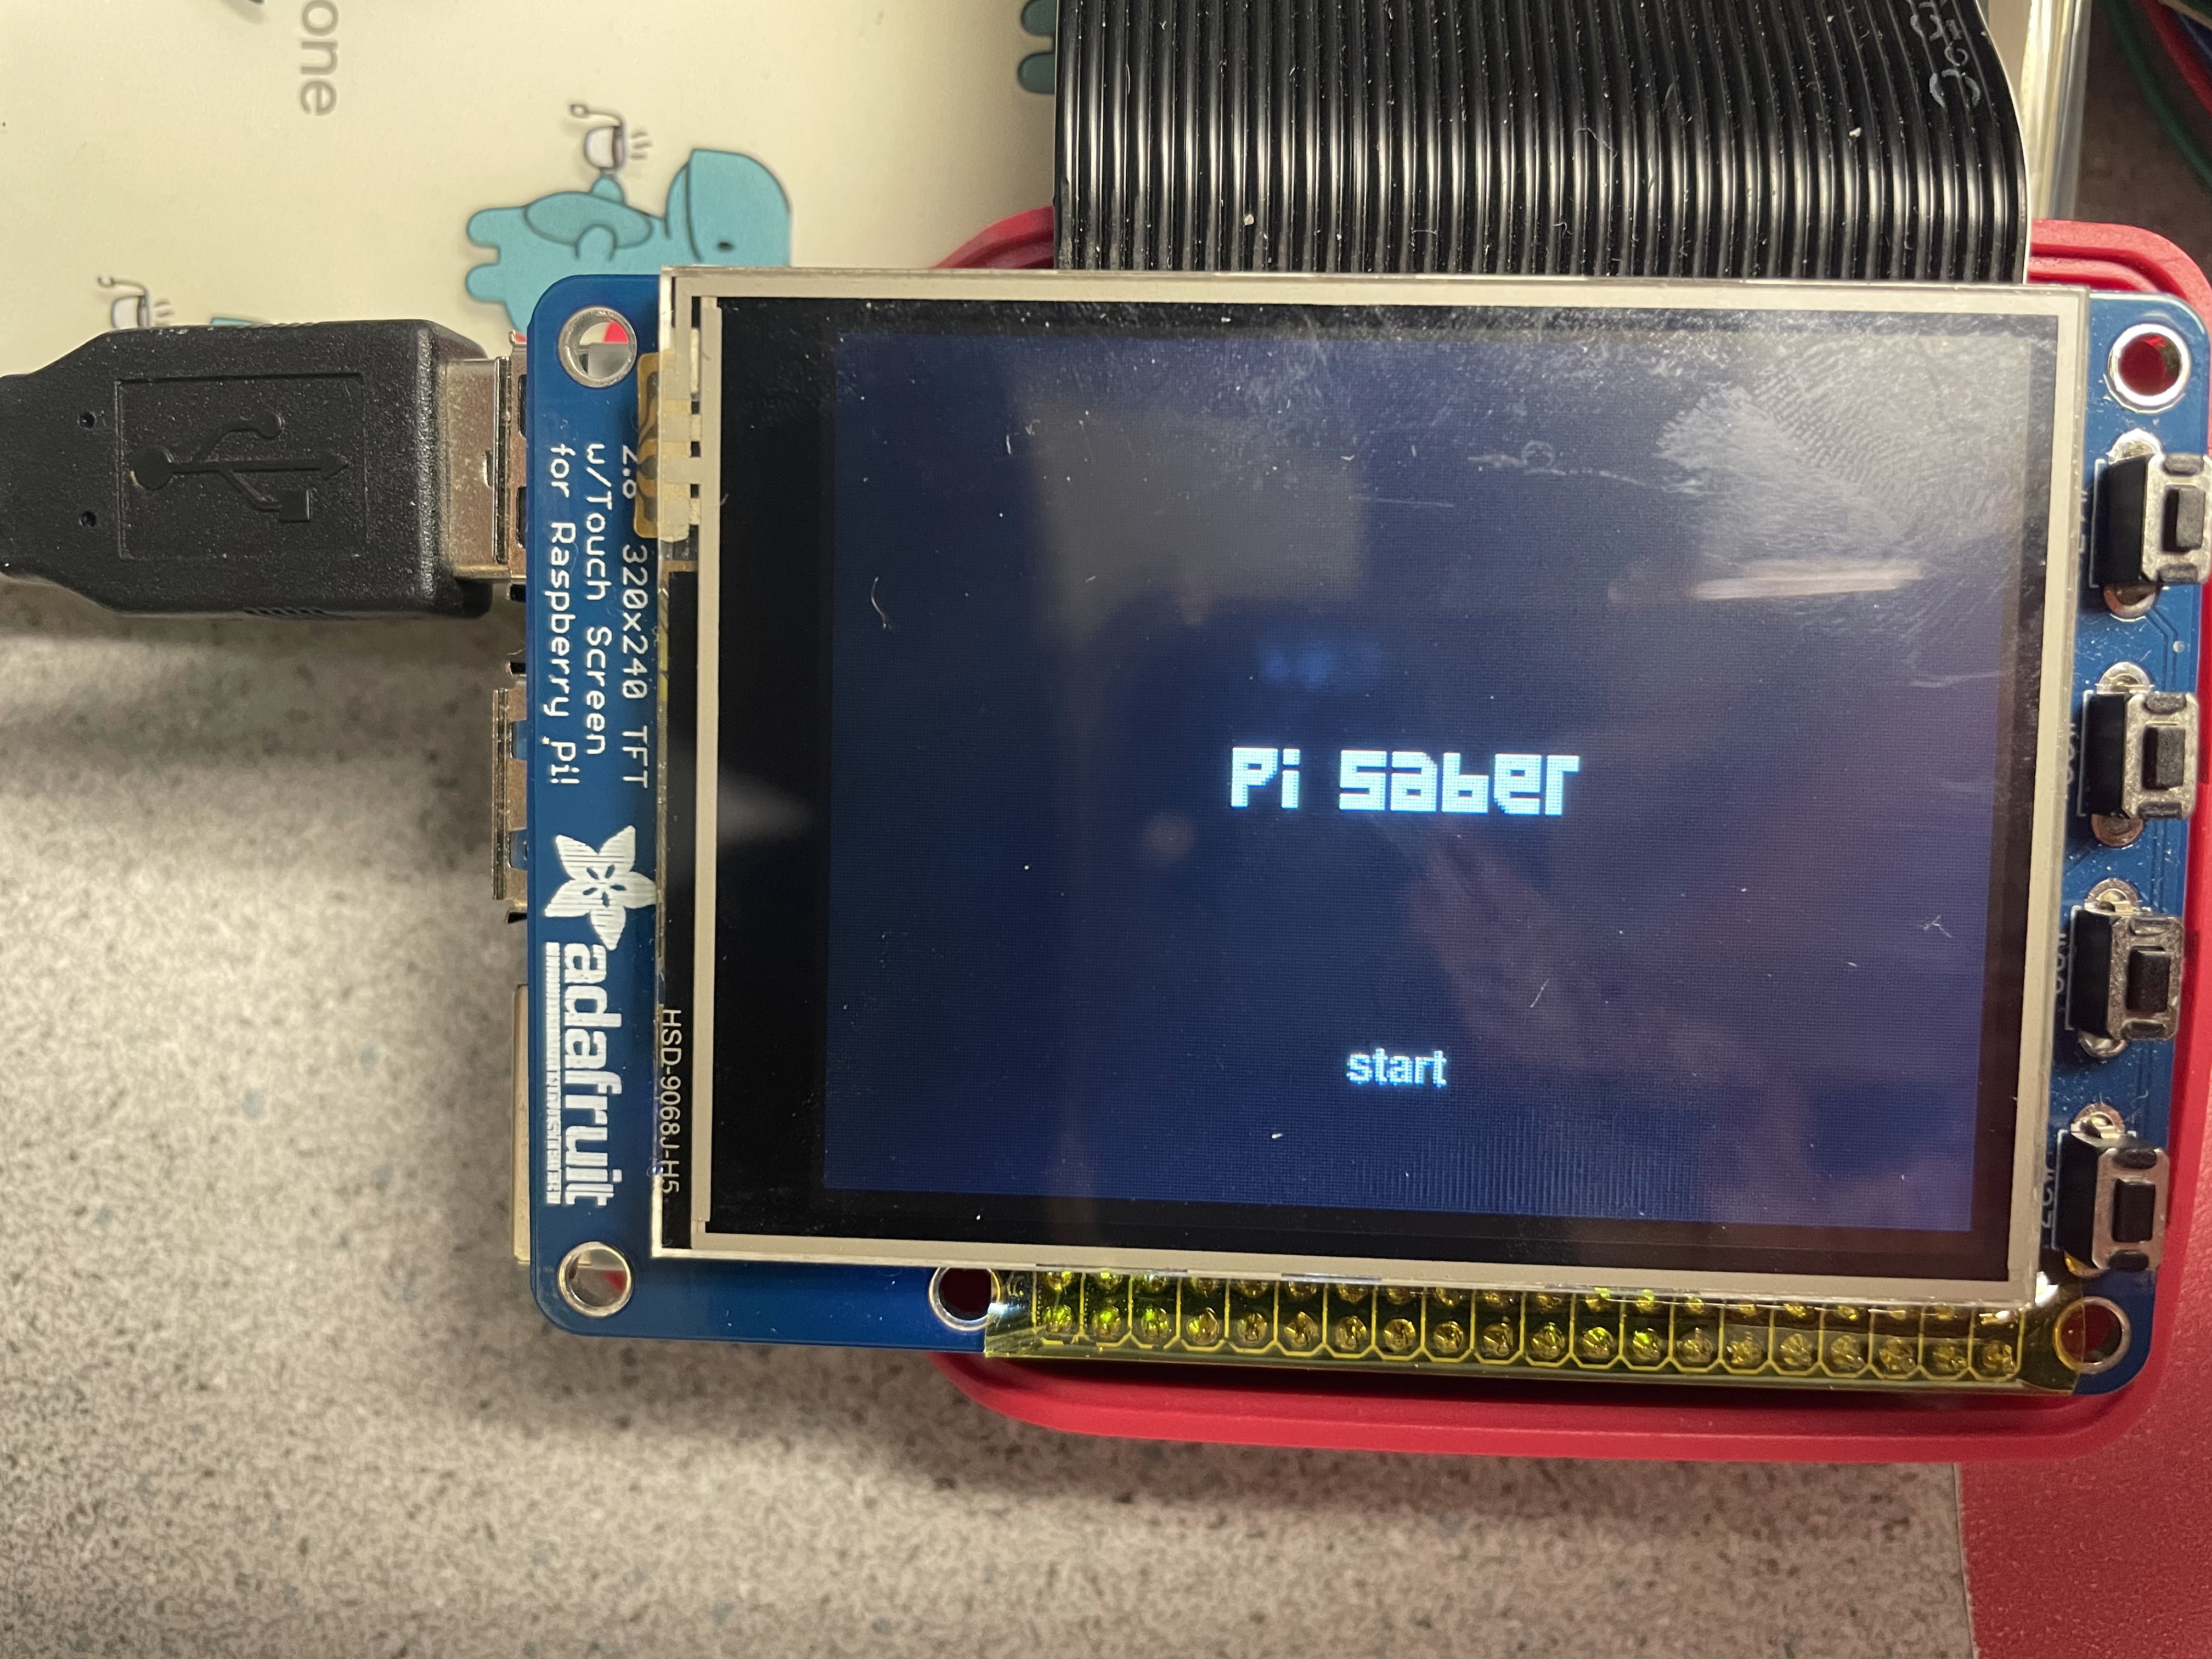
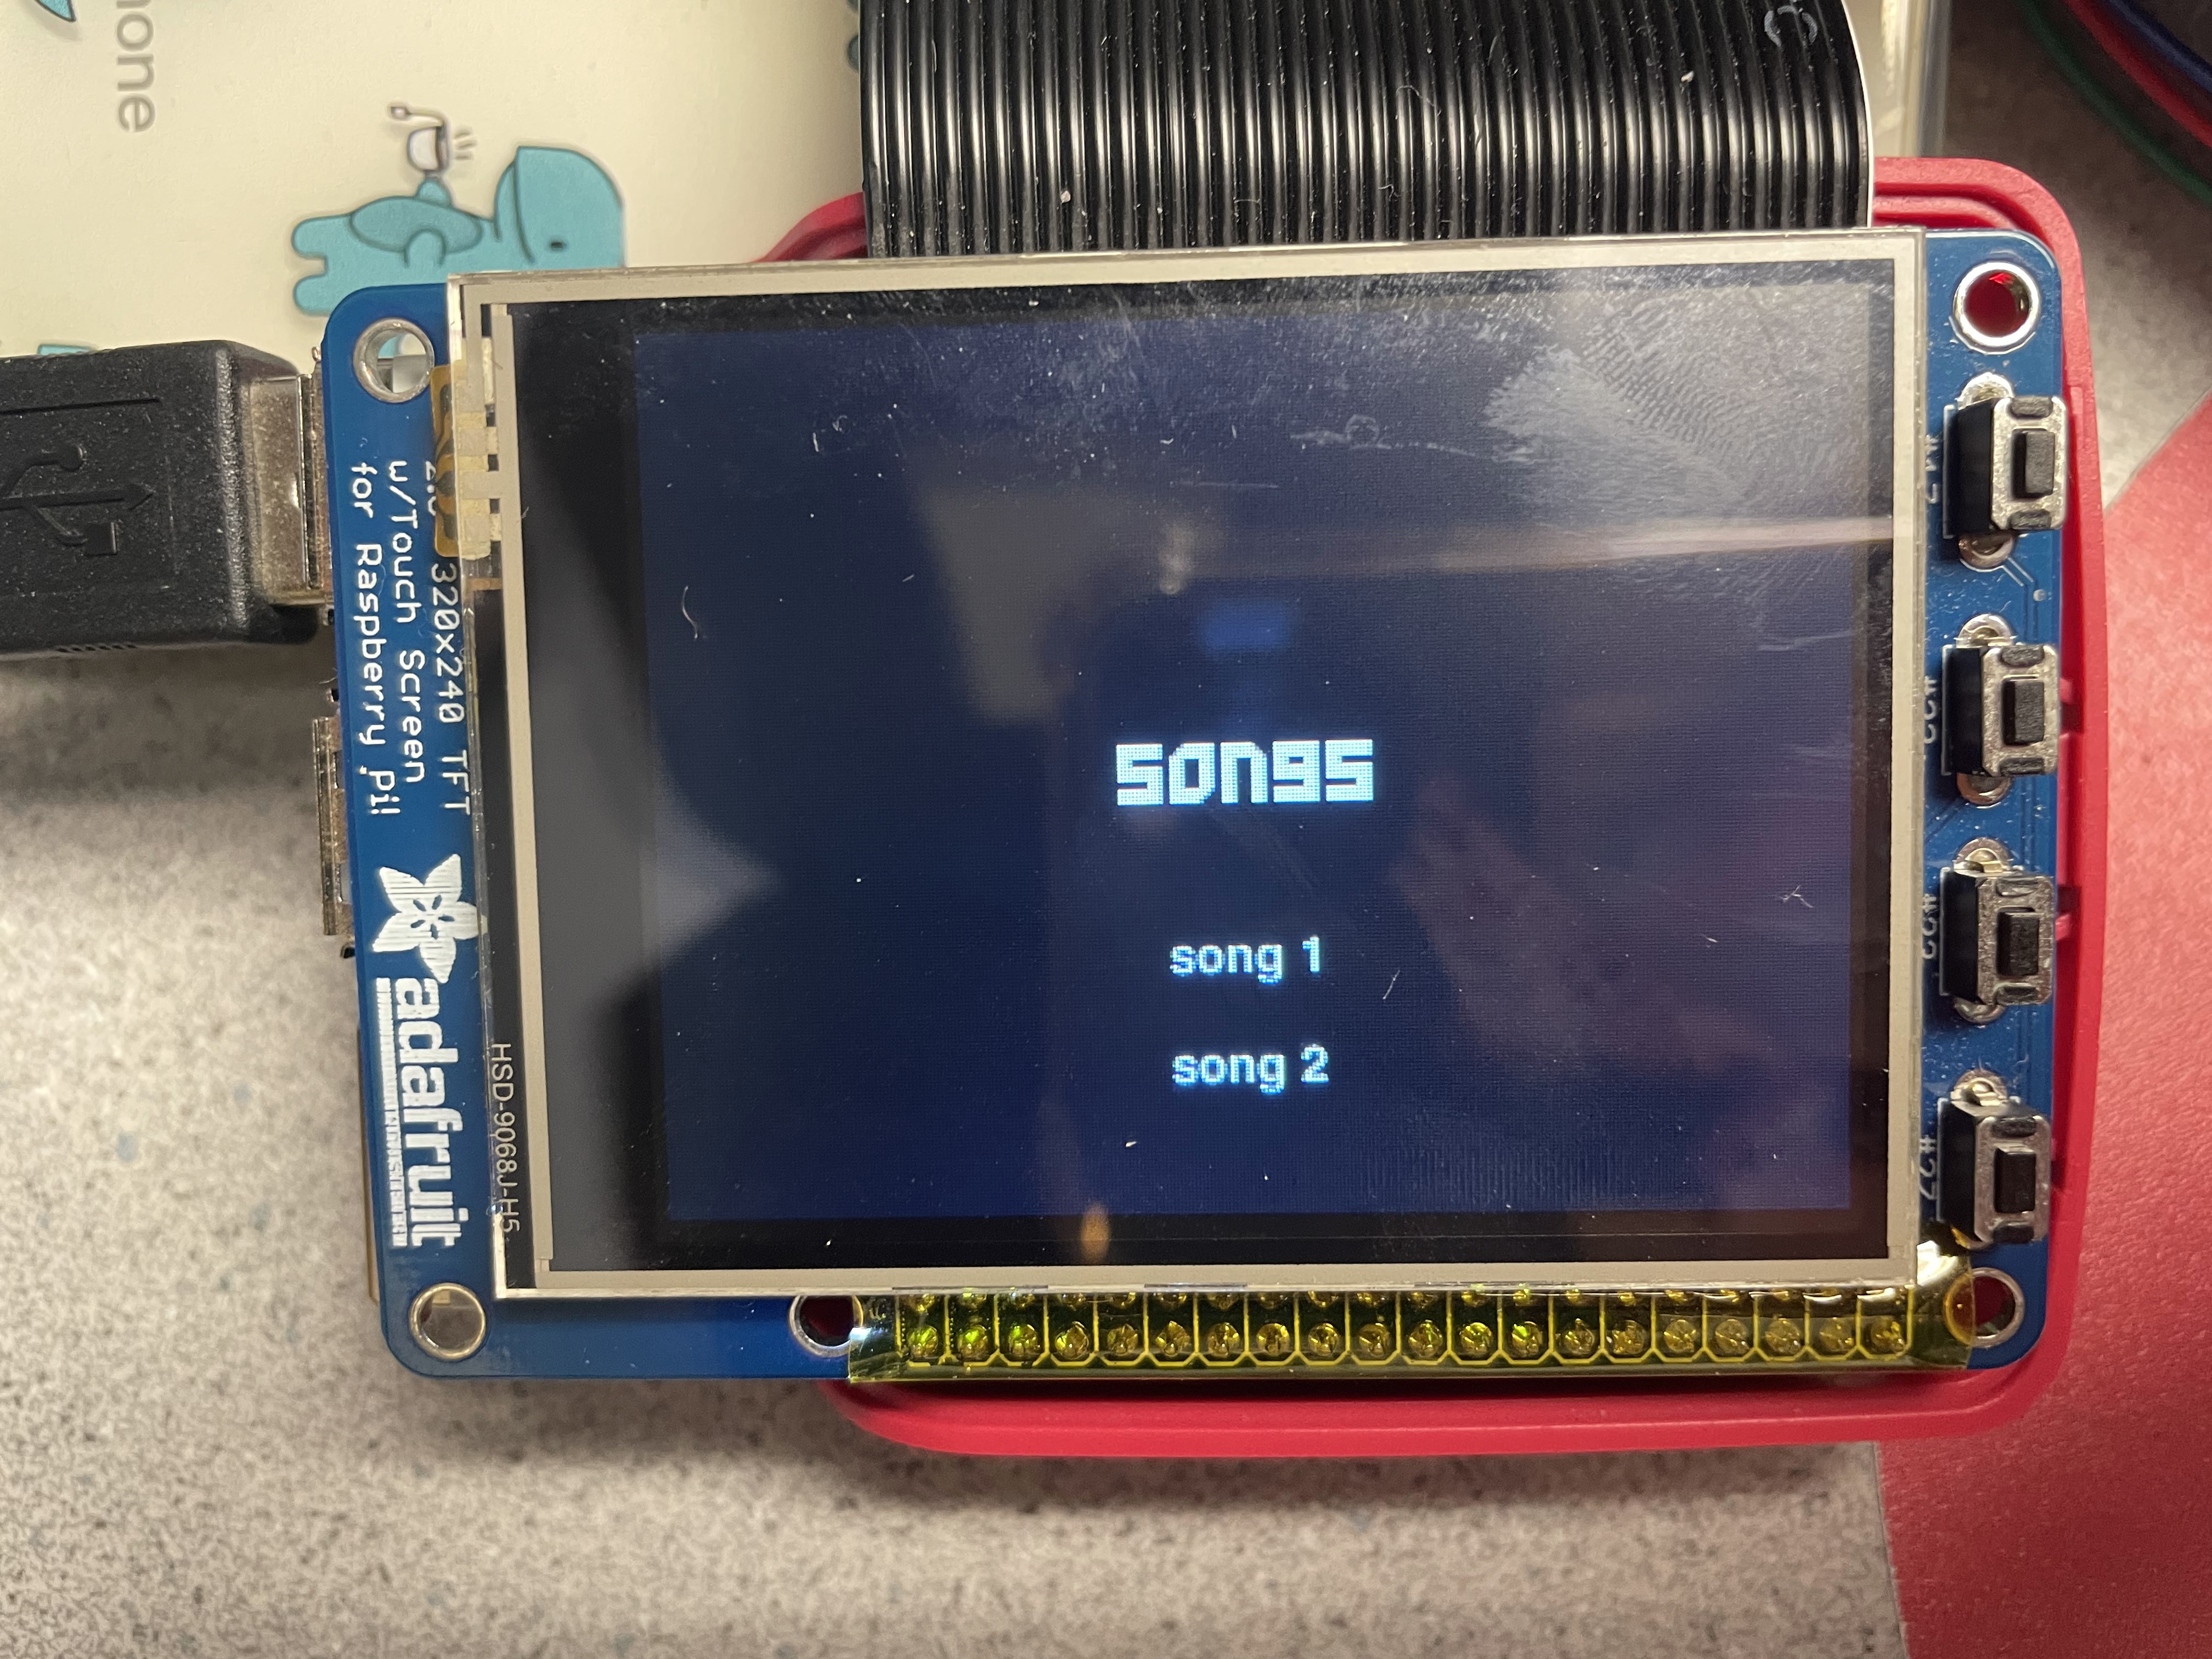
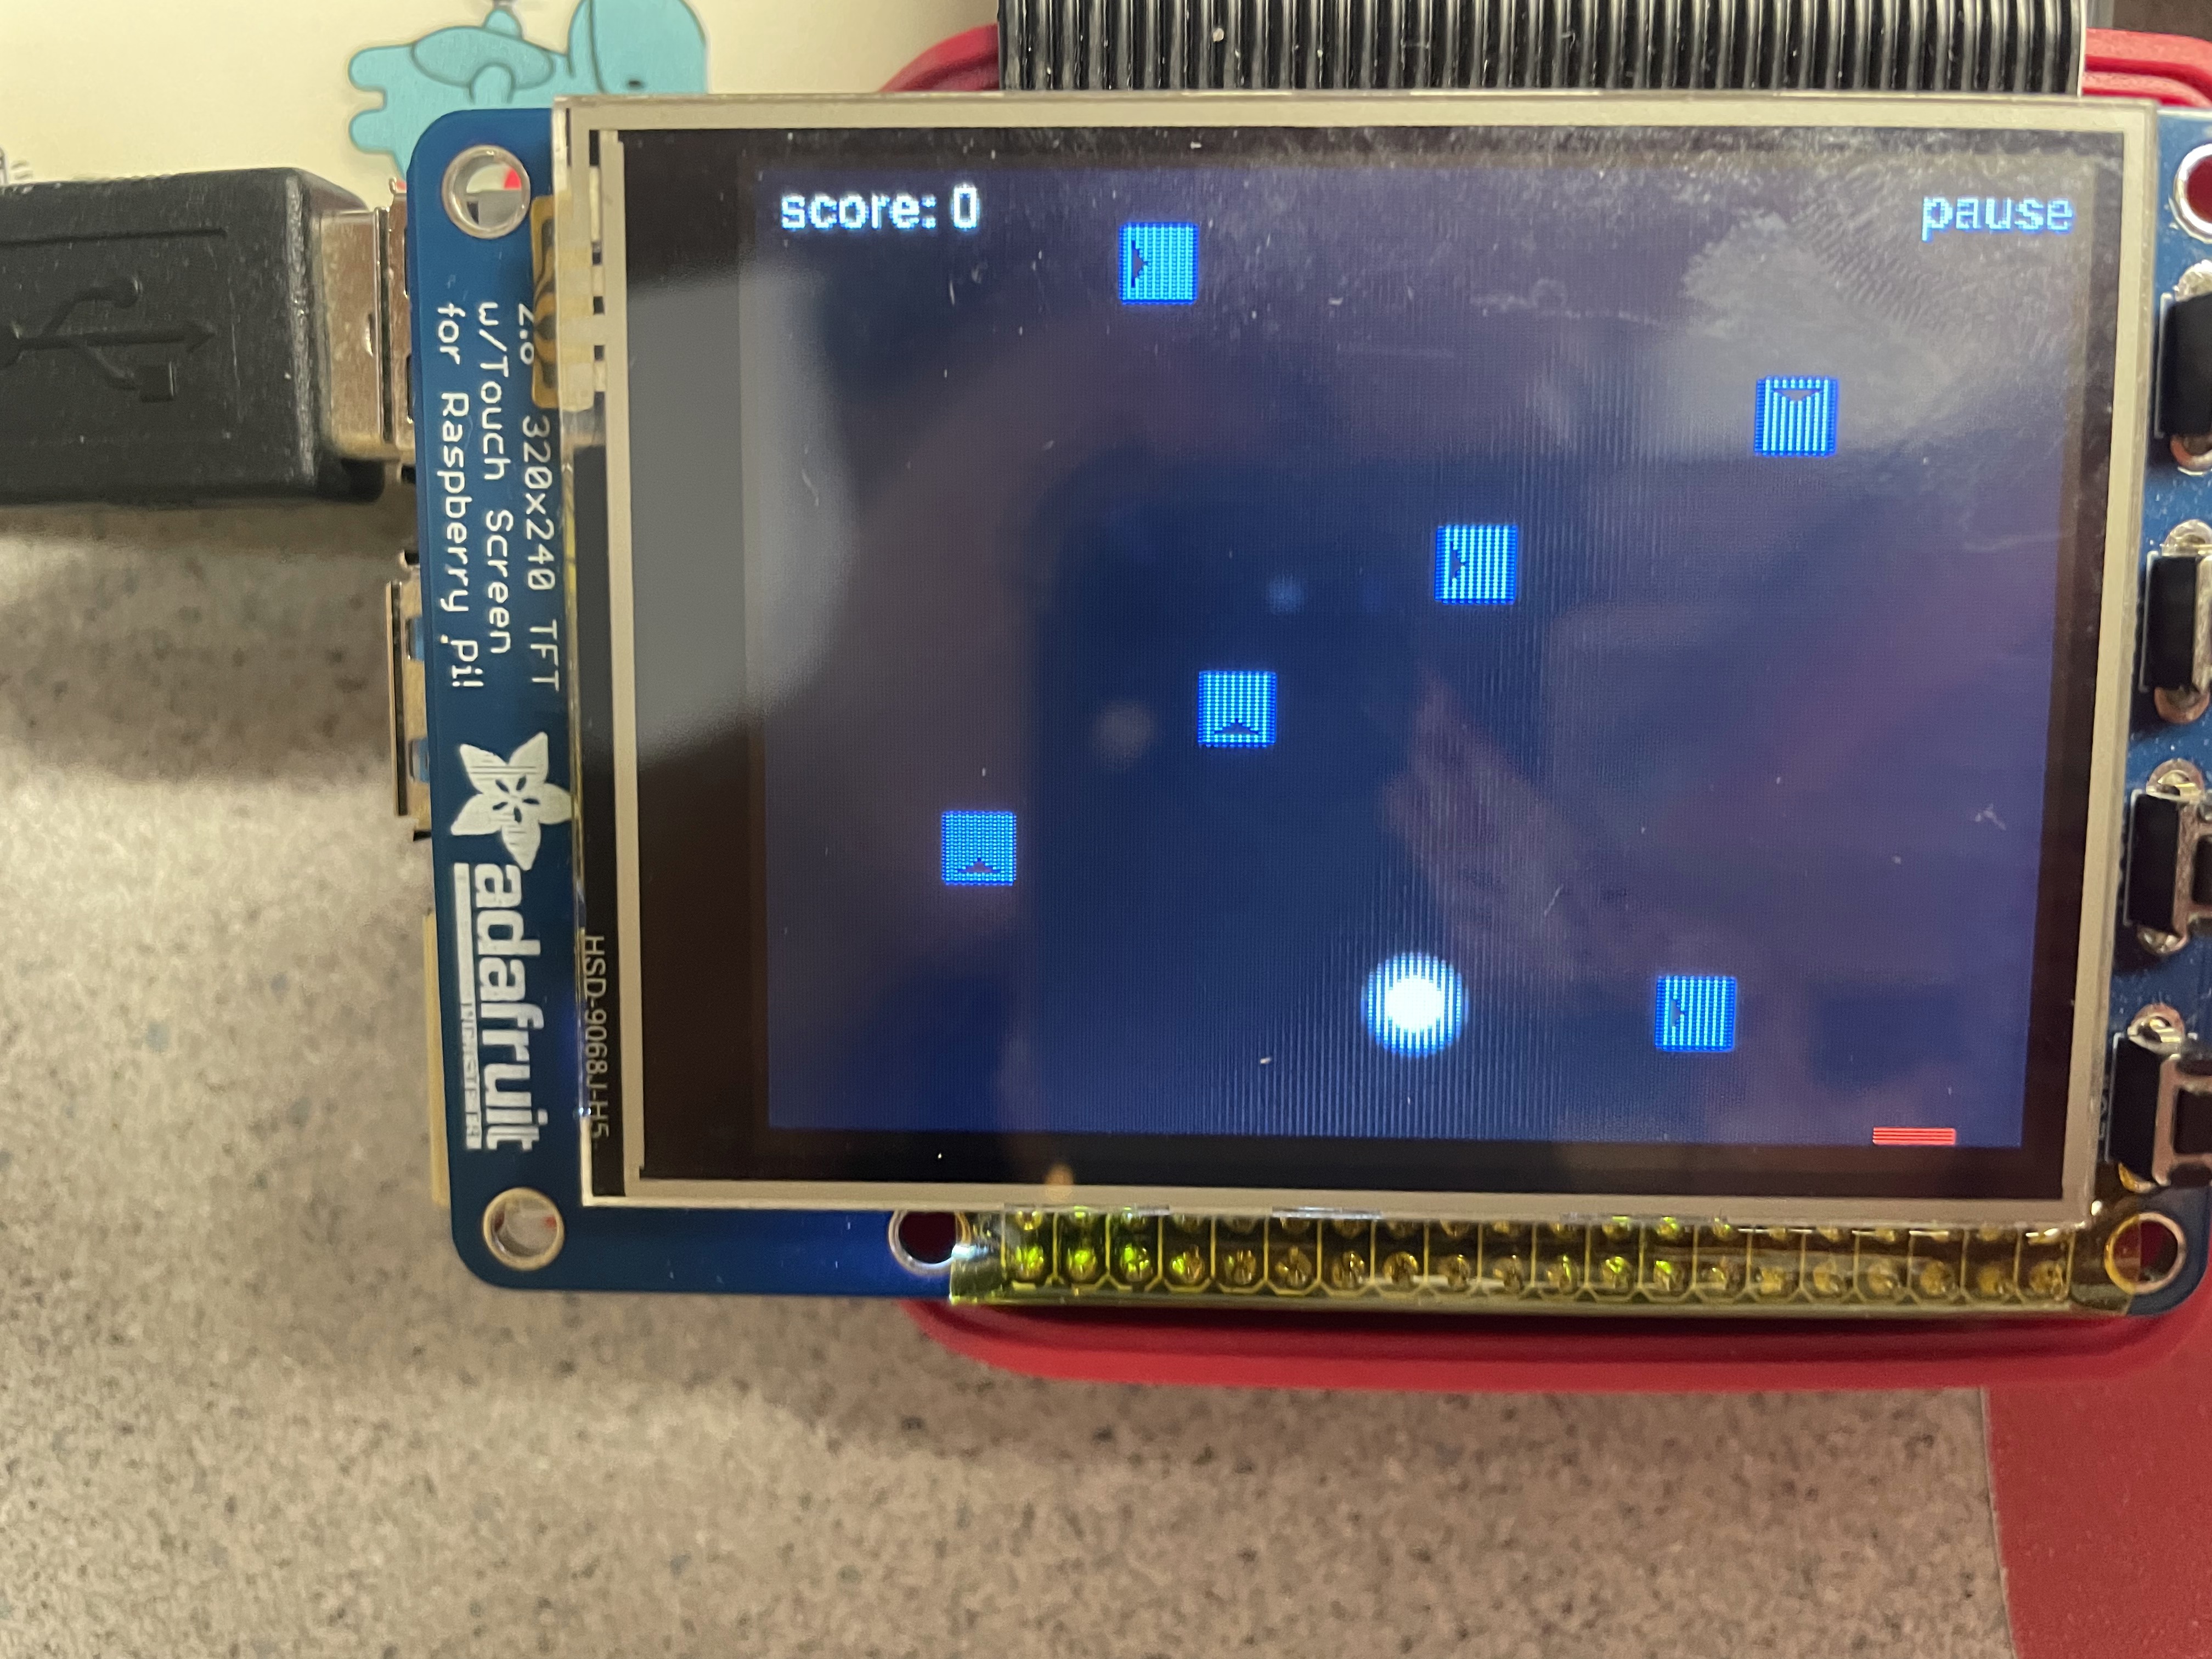
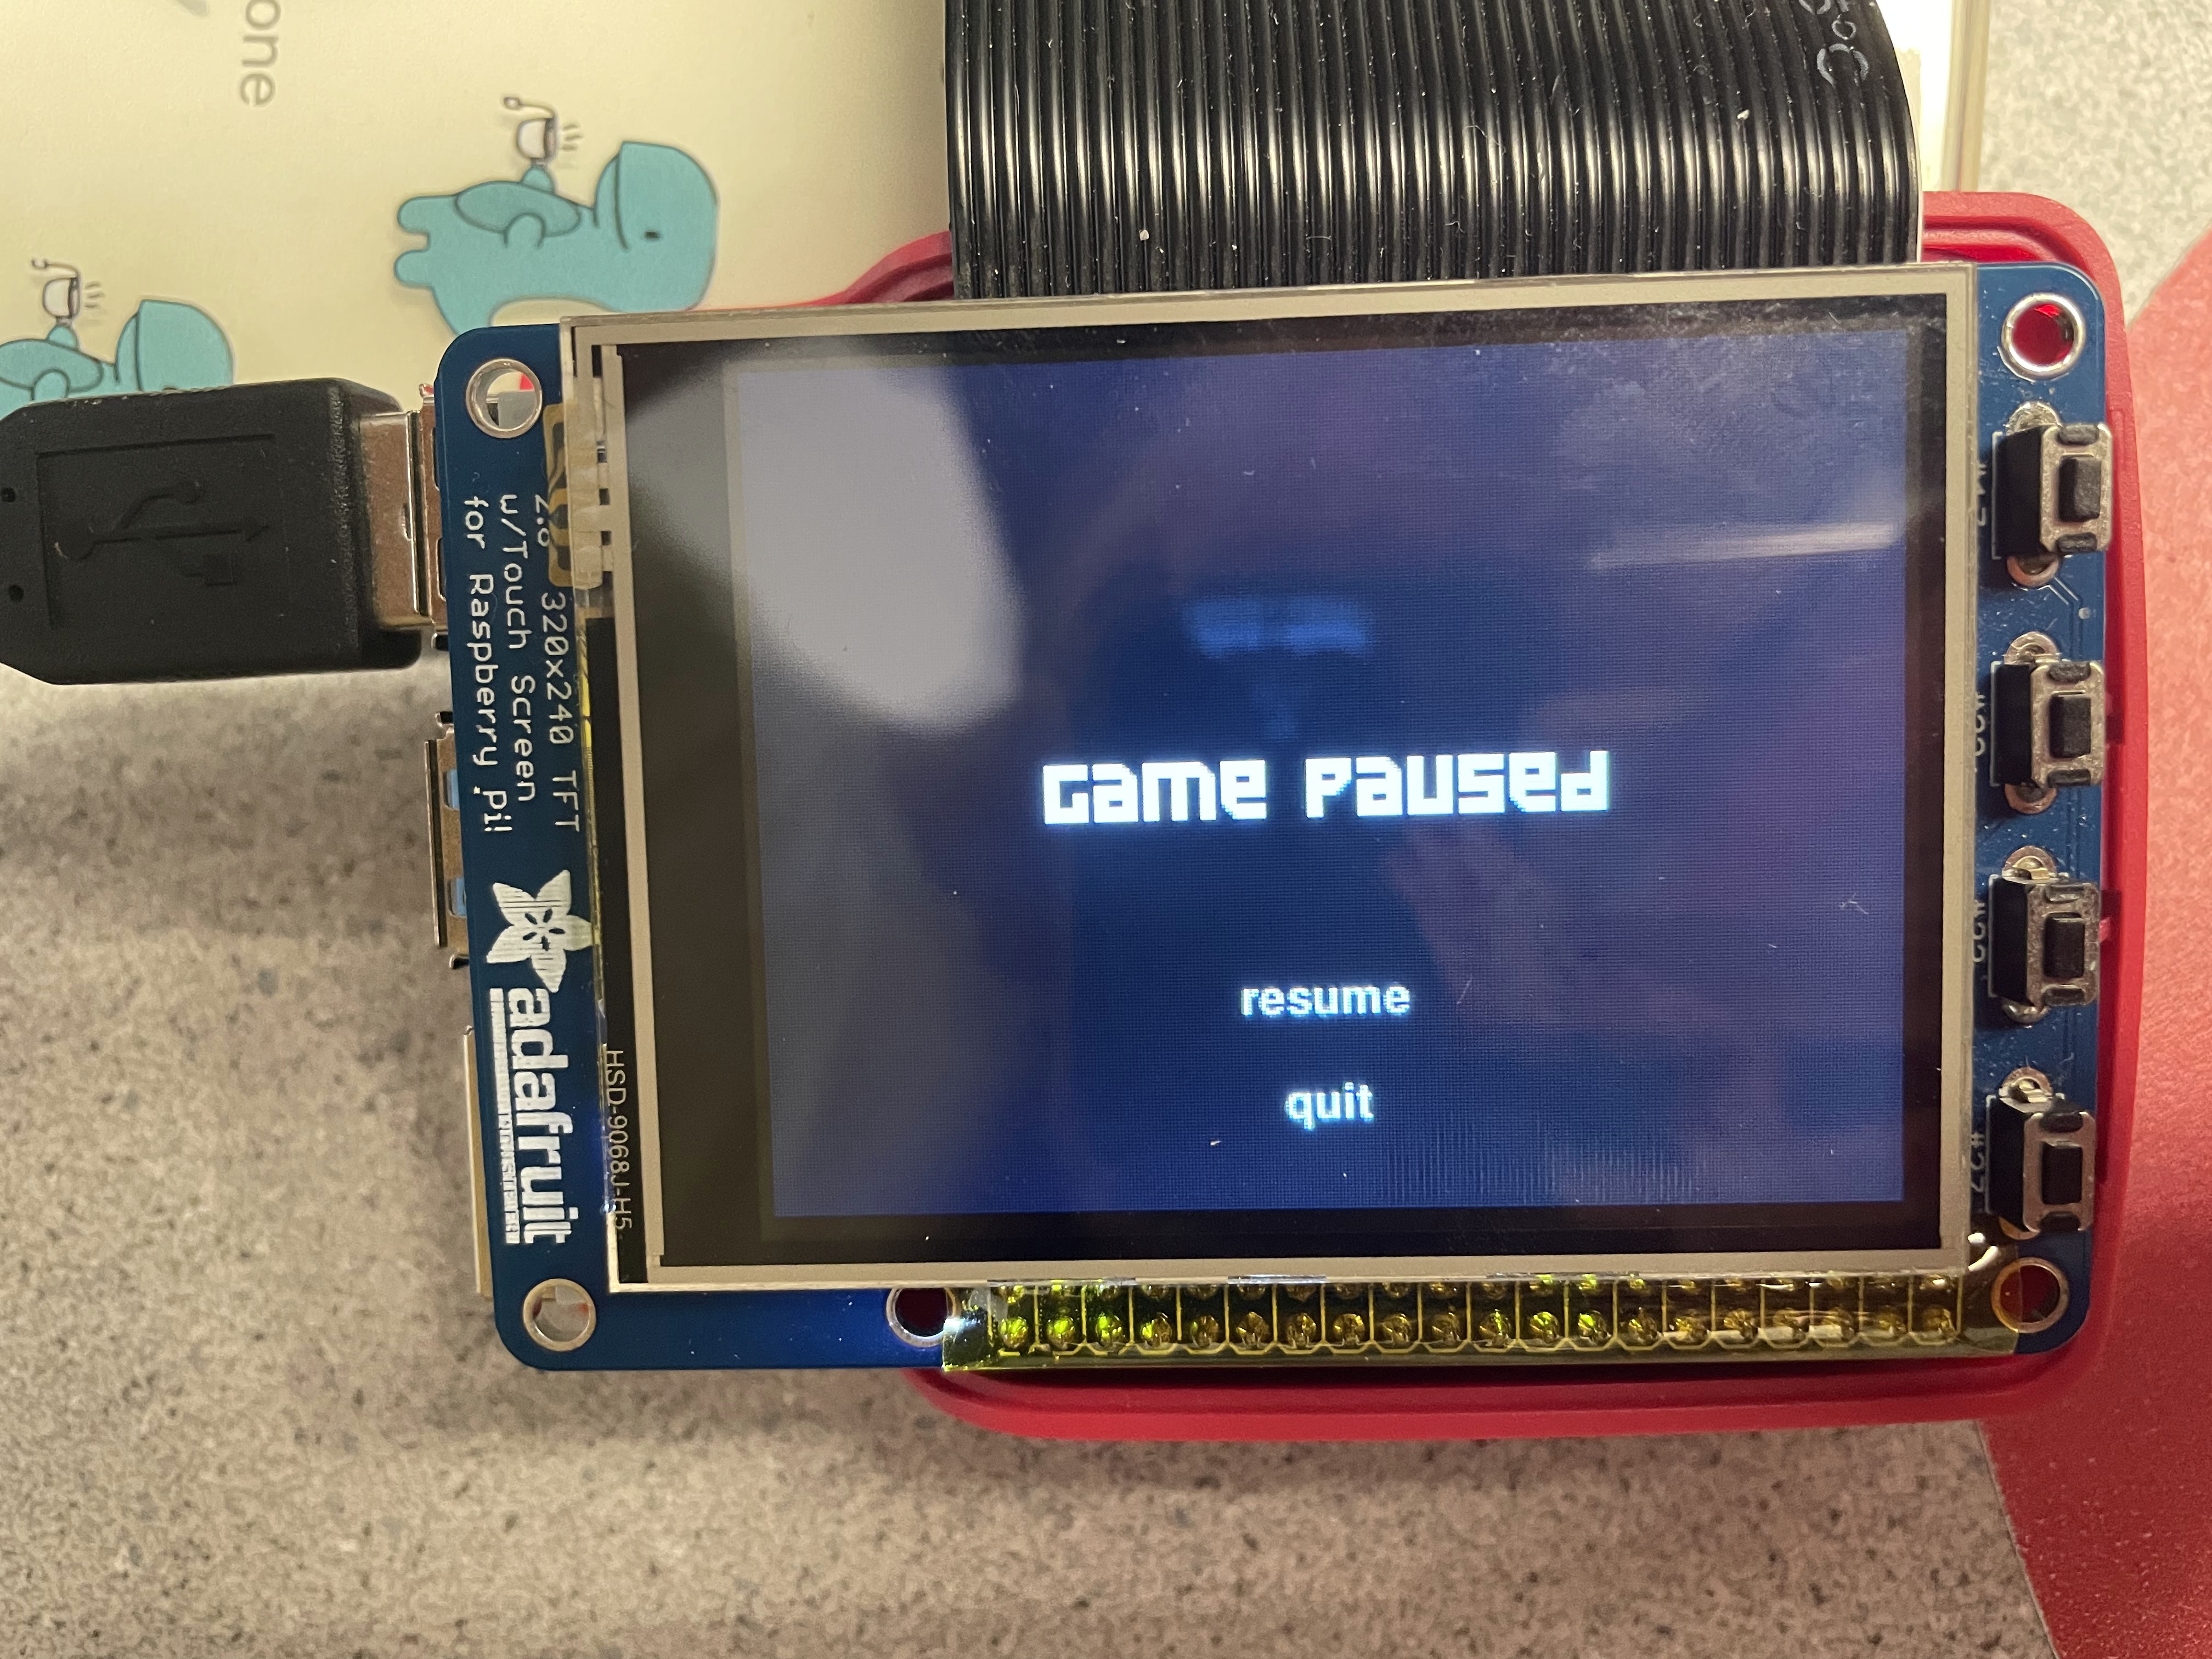

Figure 1. Examples of display for START, SELECT, RUNNING, PAUSE, and DONE states (top left to bottom
right)
The FSM below in Figure 2 shows the state transitions, triggered by pygame mouse events. This
excludes
the state transition
to the DONE state, which occurs when the song is finished playing. We keep track of the current runtime of the
game, and check when this runtime exceeds some predetermined cutoff time based on the song duration. At each
state transition, in addition to changing the state, we also need to execute other lines of code. When we
transition from the SELECT to the RUNNING state, we initialize the cursor and several variables to keep track
of
time, reset the current runtime and score, and start the music by using os.system() to issue a mplayer command
to the command line. We tell mplayer to read from a video_fifo for commands. We also set the appropriate beats
times (for block generation) and song duration for the selected song. When we transition from the RUNNING
state
to the PAUSE state, we accumulate the runtime with how much time just elapsed since the last pause (or since
the
start if this is the first pause). We then echo “pause” into the video fifo to pause the music. When we
transition from PAUSE back to RUNNING, we record the timestamp when we are restarting the runtime and echo
“pause” to the video fifo to restart the music. To transition from PAUSE to START, we kill all of the arrow
sprites, and echo “quit” to the fifo to quit mplayer. When the transition to the DONE state, we kill all of
the
arrow sprites, and update the appropriate high score for the song that was just played. We also “quit”
mplayer.
The reason why we need to issue a “quit” command to mplayer is because we need to deliberately quit the audio
in
order to restart it. Furthermore, if we just let mplayer run the music to completion, the game would have no
indication that the song has finished playing.
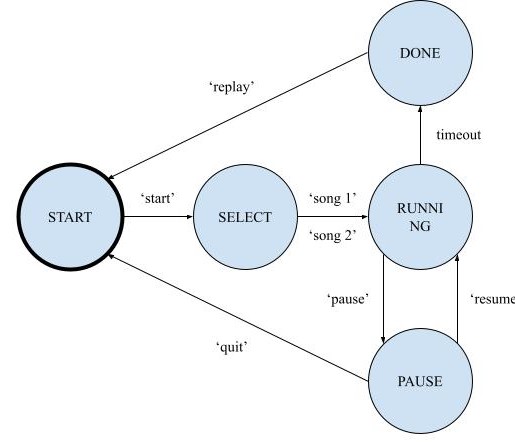
Figure 2. Game state FSM
We tested the functionality of the game states primarily by manually playing the game. We made sure that each screen appeared when expected, after a certain event (pressing buttons, being at the end of the game, etc…). For pausing and resuming, both the blocks and the music indeed paused and then started off from where they were before pausing. Additionally, we made sure that the correct song played when selected, and made sure that the game and music ended in sync.
Different Music Options
As briefly mentioned earlier when describing the FSM, the user has the ability to choose between two songs. We store beat times and durations for both songs in a file of constants. When either the “song 1” or “song 2” buttons are pressed in the SELECT stage, we update a global beat_times variable to the corresponding beat times variable for the selected song, and do the same for the song duration. Furthermore, we issue a different mplayer command to start playing music for the two selections. Since we need to know which song is currently playing, we also maintain a variable that keeps track of whether song 1 or song 2 was pressed. By updating a generic variable for the beat times and duration, and using the same fifo for both audio files, we are able to reduce code redundancy by reusing the same code for both songs. Again, we tested this functionality by playing the game, and seeing if selecting either option worked.
Physical Quit Button
In addition to quitting the main RUNNING state, we also included a physical button on the PiTFT that would allow us to quit the Python program completely. This button was tied to GPIO 17 on the Pi, and we created a callback for it. Upon pressing the button, since our game play code lies in a while loop, we set the condition flag for the loop to False, stopping everything. We also kill all the block sprites on the screen and quit mplayer if it is either playing music or paused (in RUNNING or PAUSE state). Then, we have a call to clean up the GPIO set up and finally, the program exits. We tested this by attempting to quit the game in various different scenarios (playing, paused, finished, etc…). Initially, we had an issue where we would sometimes crash the game due to sending an extra “quit” command to mplayer to stop the music, but fixed that with the conditional quitting described above.
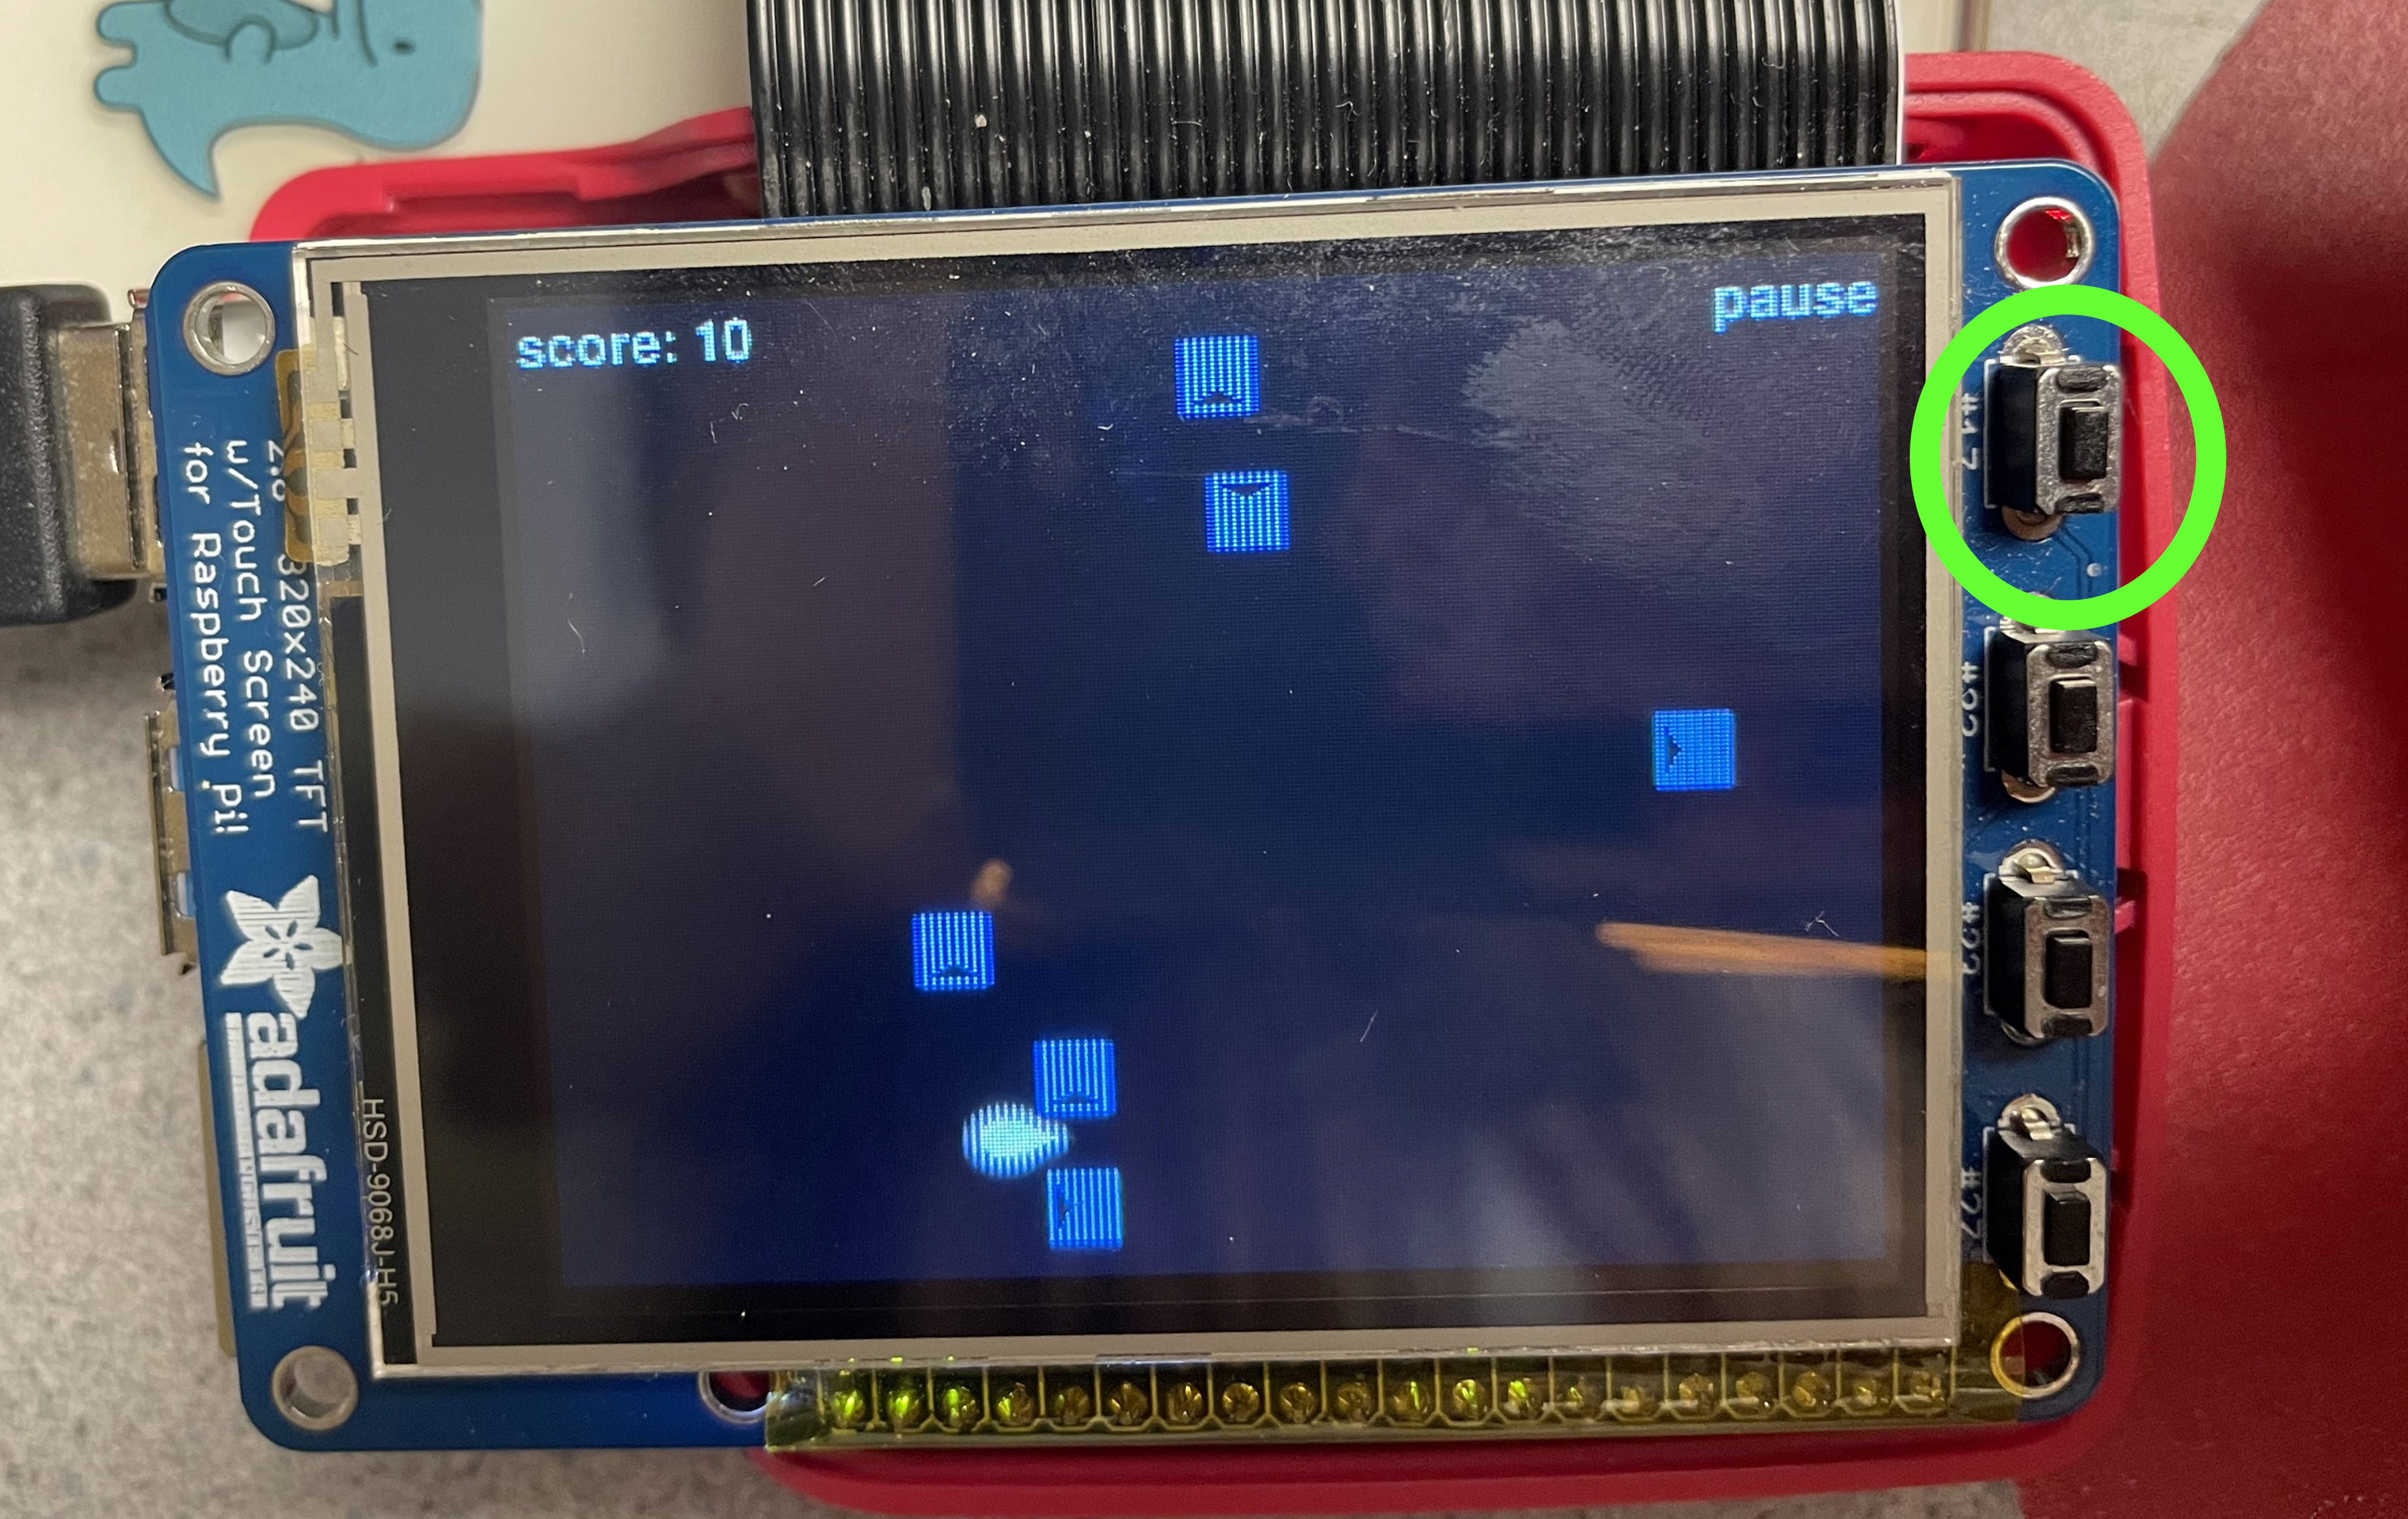
Figure 3. Physical quit button circled in green
Game Sprites
In addition to the game states, we created a class for our cursor on the screen, the visualization of the “player.” This included a way to move the cursor by updating its x and y position attributes accordingly. For our game, we are restricting the cursor to only horizontal movement so that the player can only slash a block when it has fallen to that height (so that it can be timed with beats in the music). We also have custom images for the unmoving cursor, images for when the cursor is being moved to the left or right, as well as images for the cursor “slashing” either up, down, left, or right.
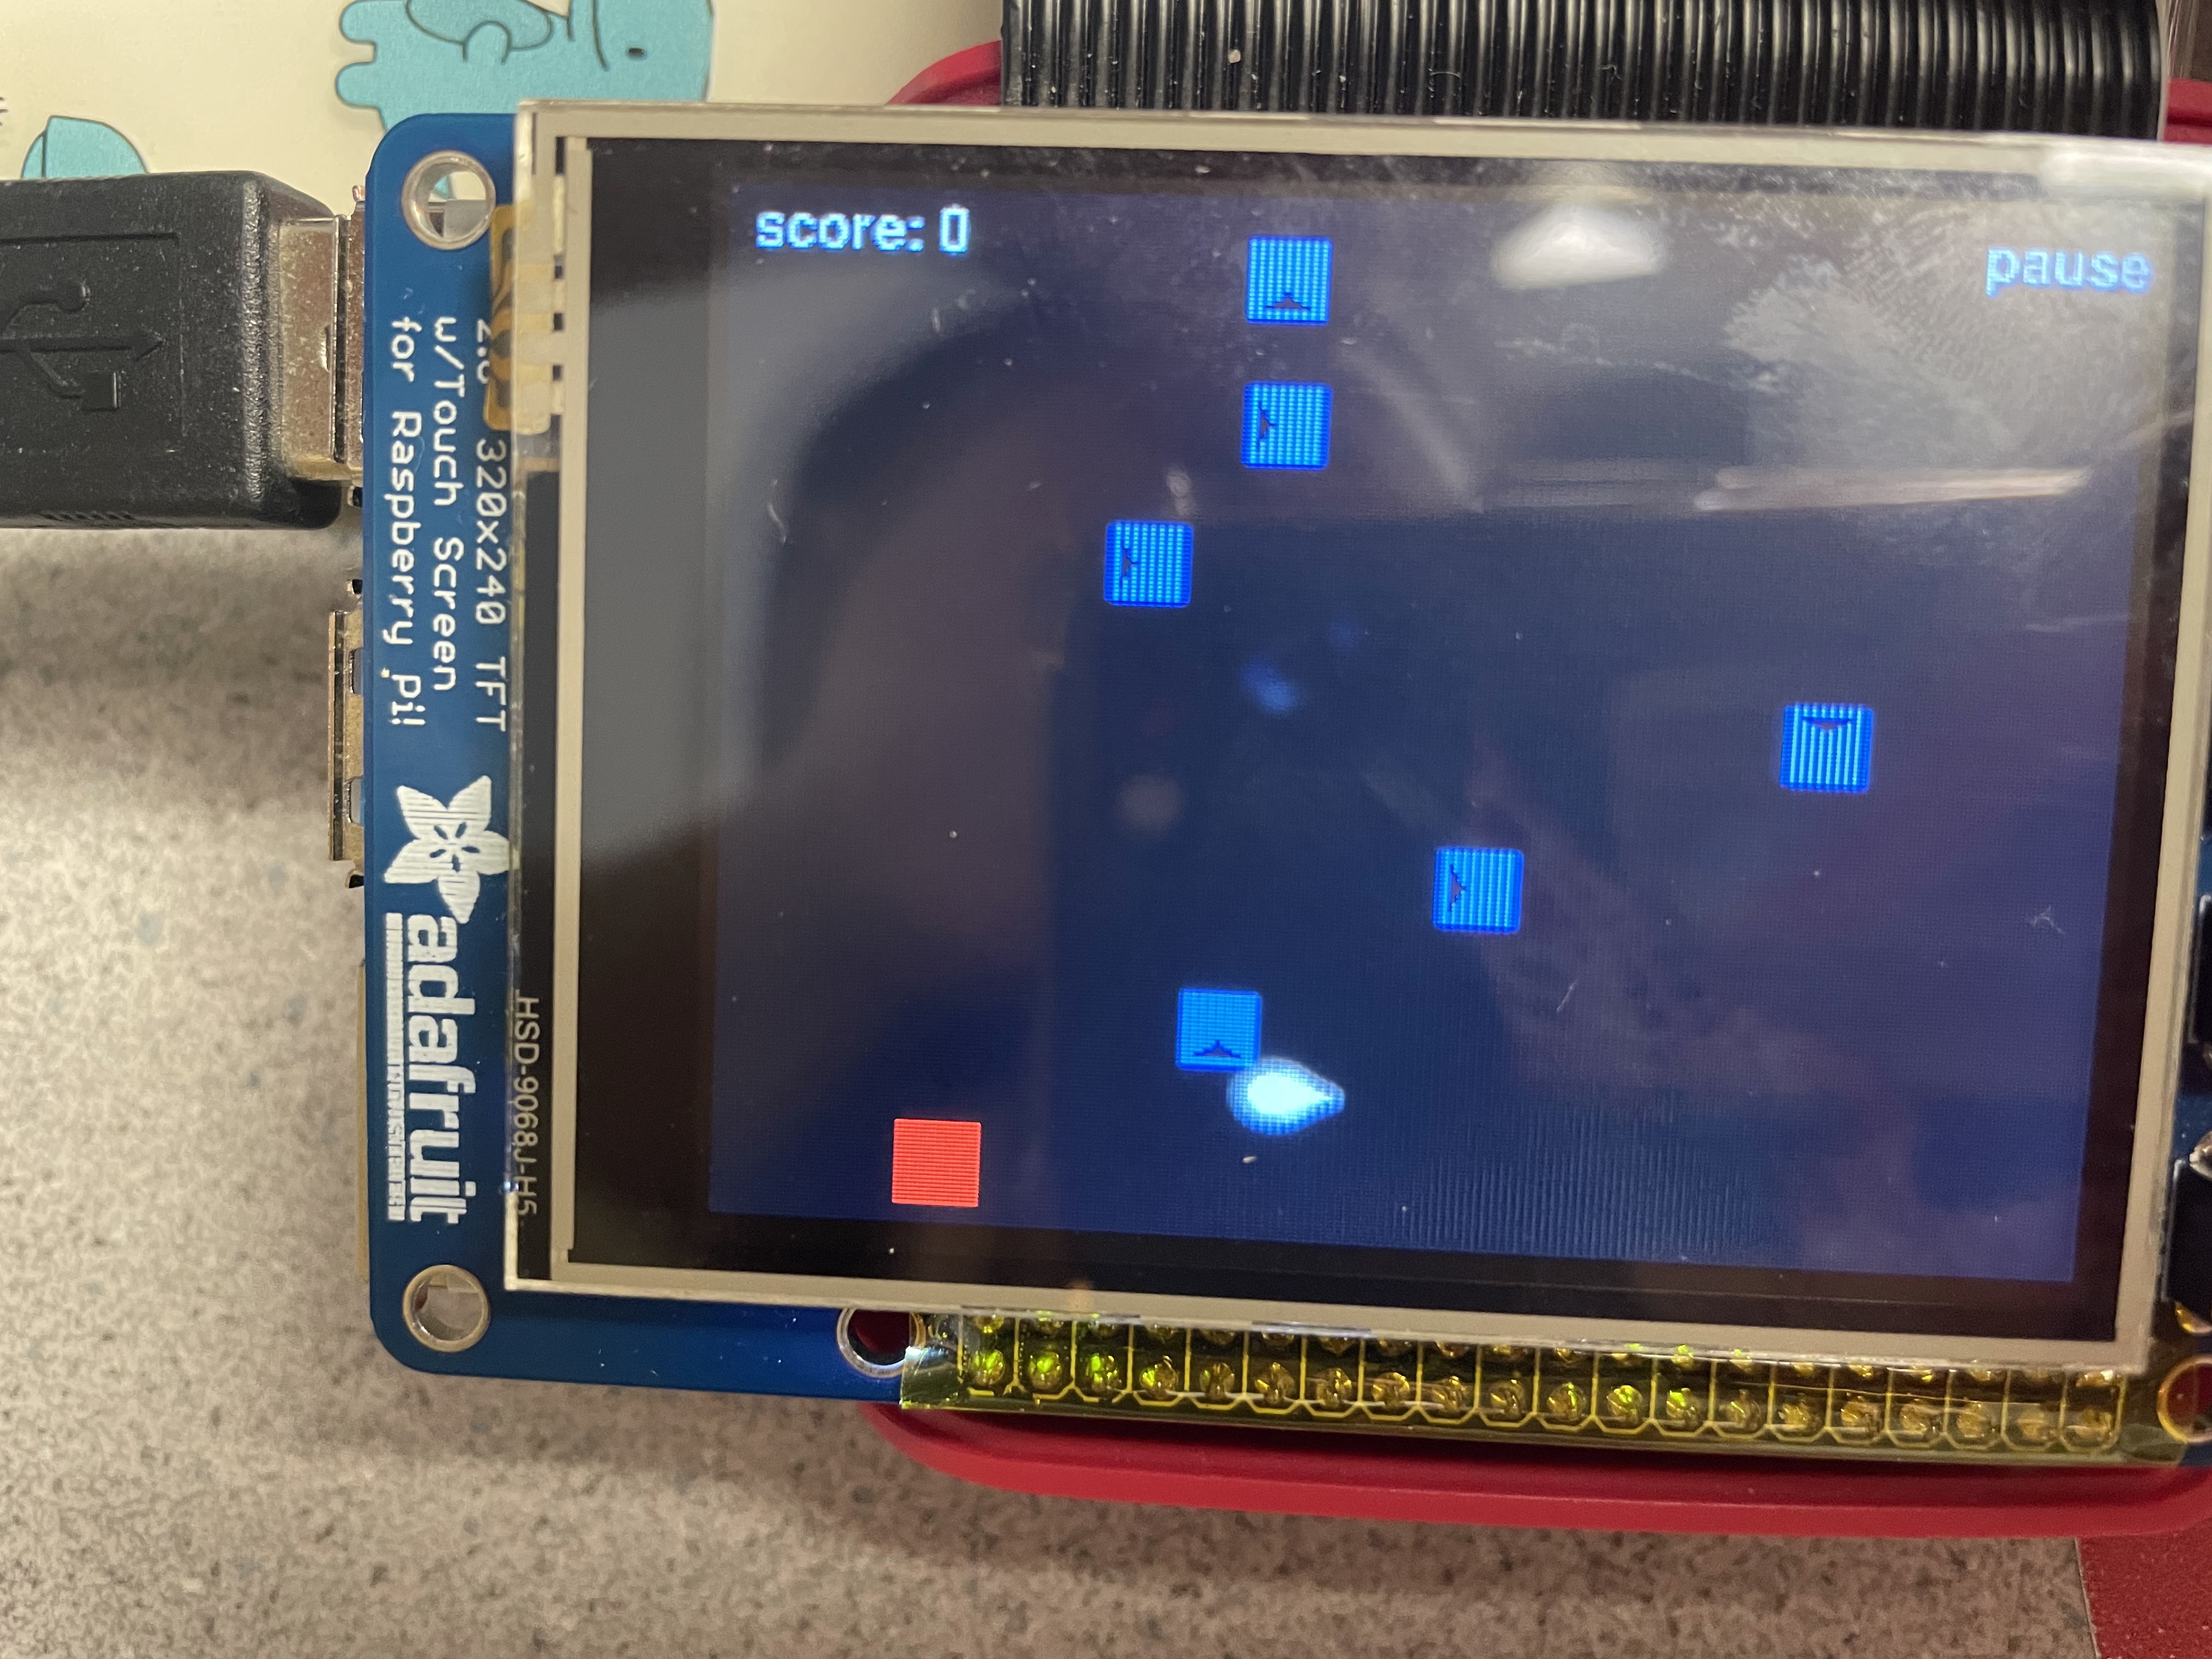
Figure 4. Cursor animation to the side
Next, we also created a class for the falling “arrow blocks,” the main component of our game. This also includes a method to move the block based on its speed, as well as change its image if the block is hit by the player while playing the game. In each instance of the arrow block, we also store which direction the arrow is pointing (UP, DOWN, LEFT, or RIGHT) to be able to check for the correct slashing direction during game play. Each block is initialized as “not hit” (hit = False), and thus its image is an uncut arrow block. When the block is cut, the image for the block will change to one that looks sliced.
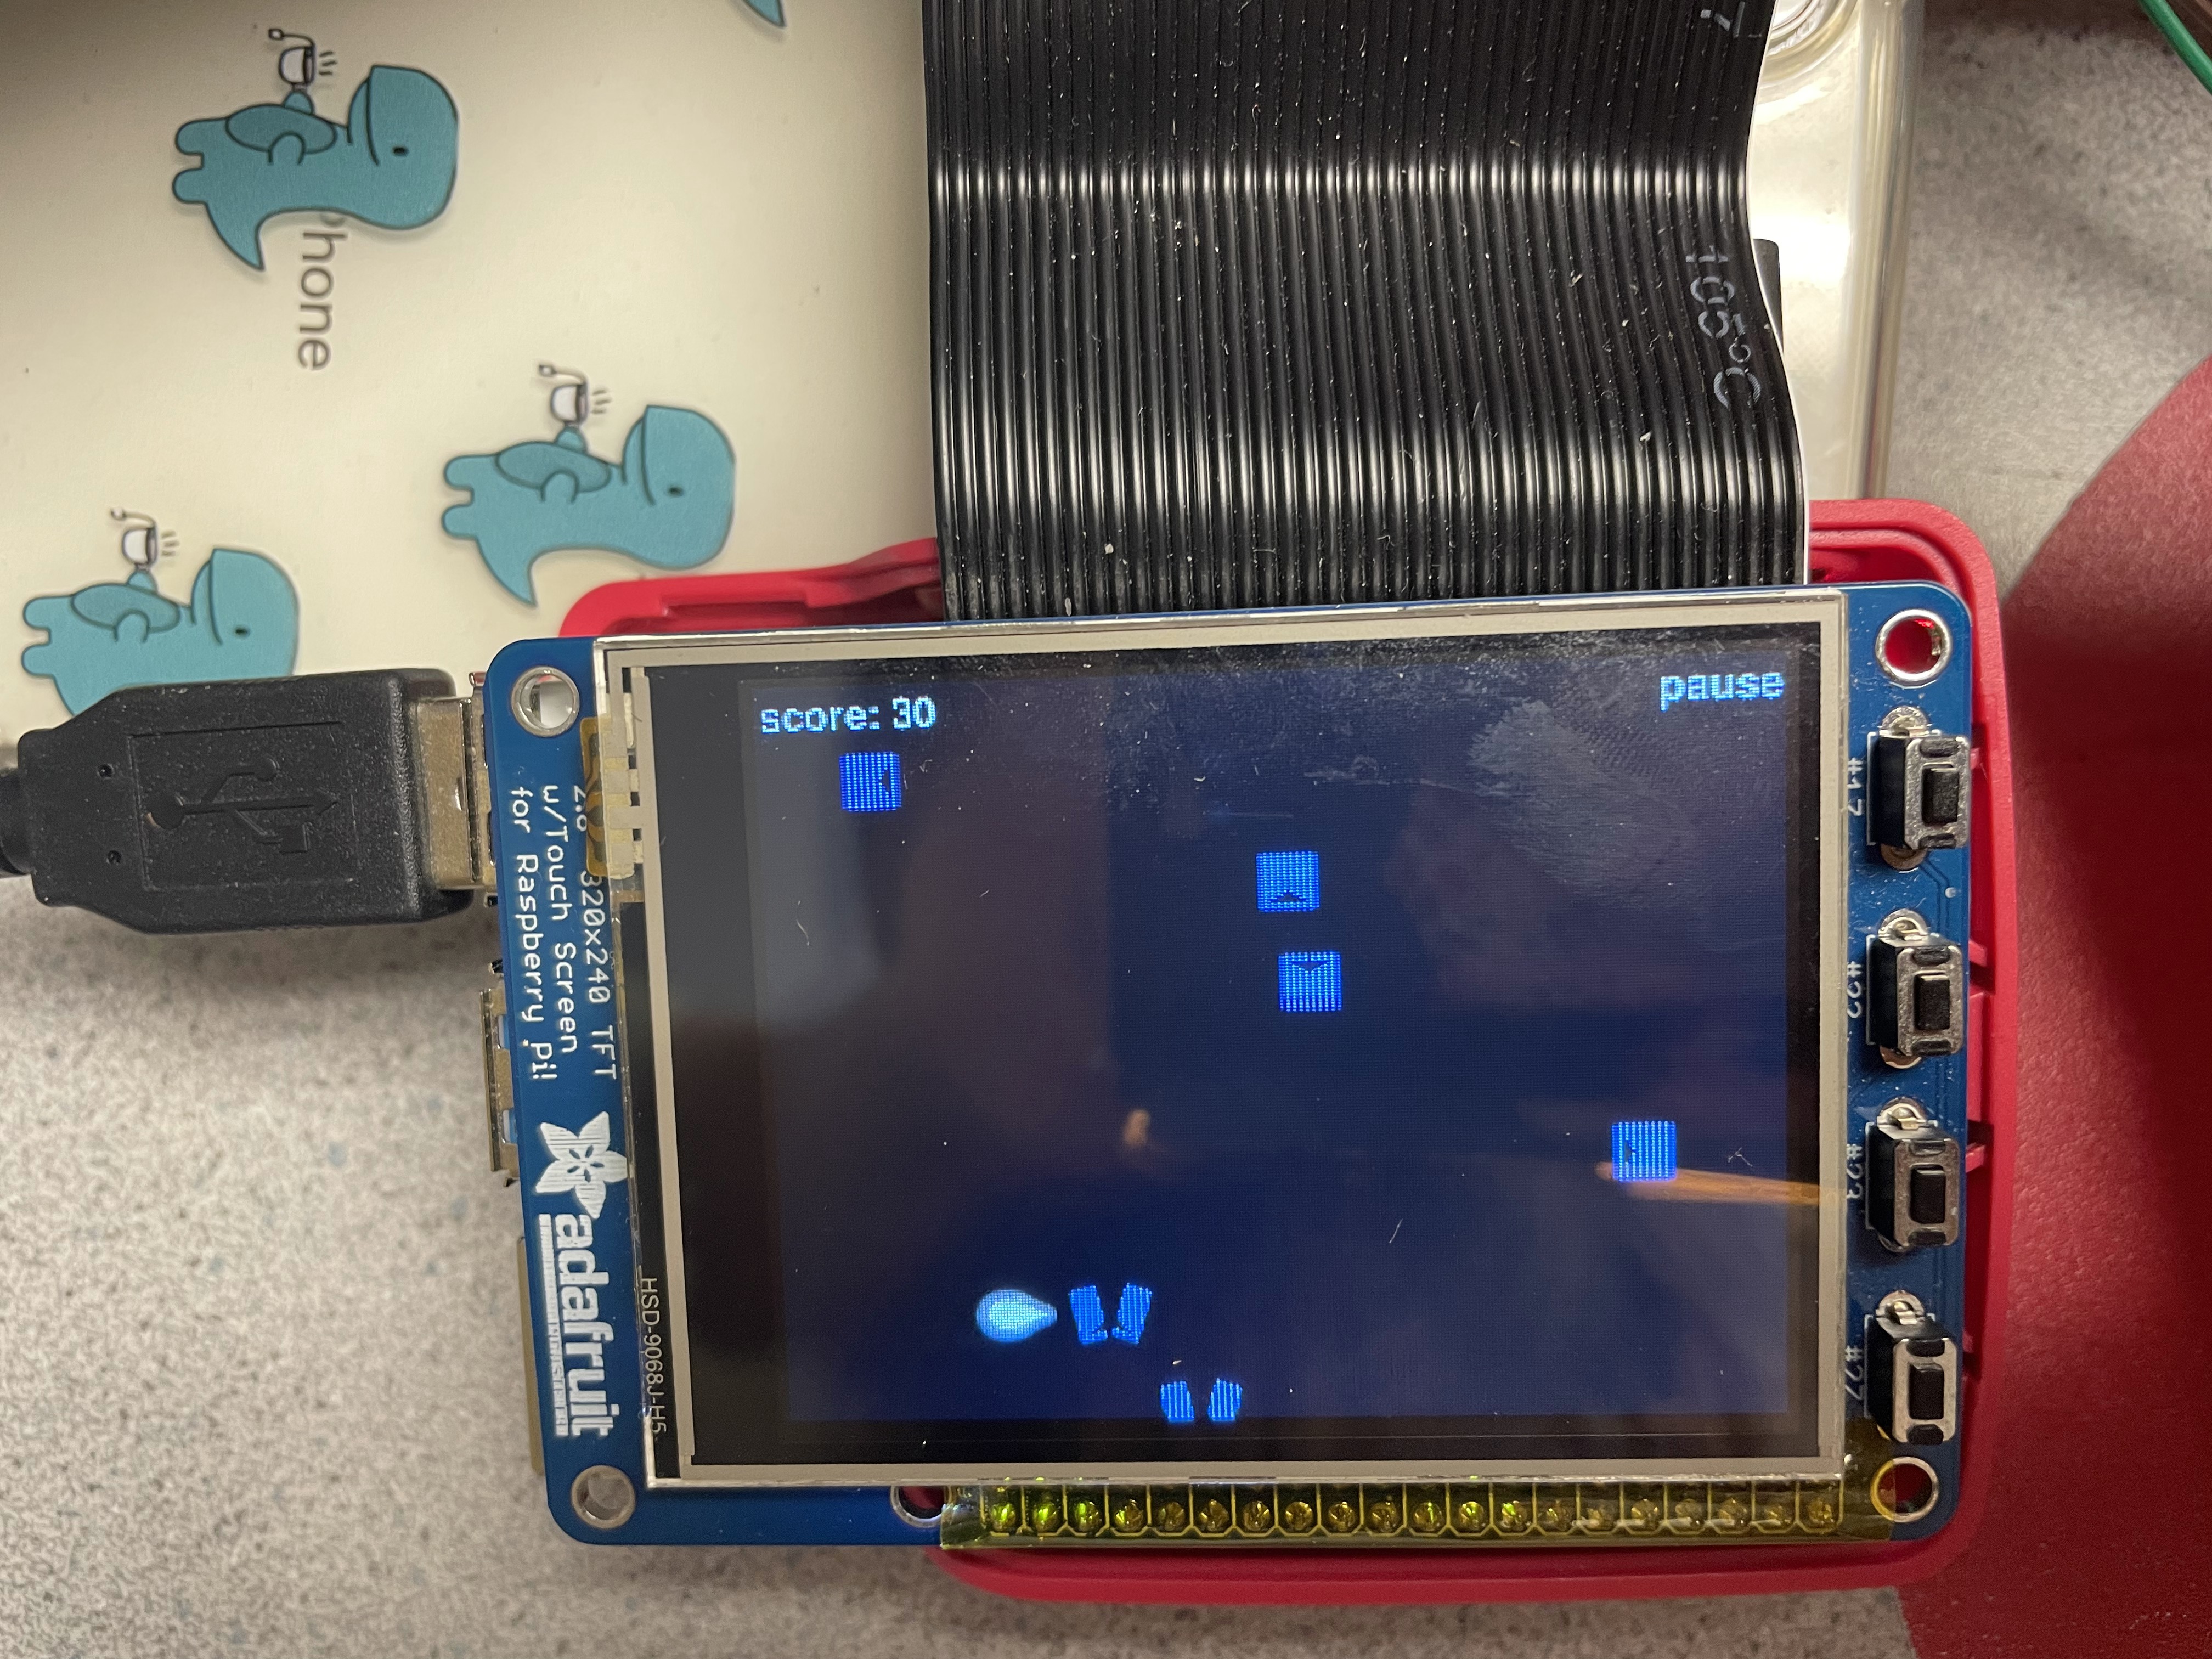
Figure 5. Up arrow block being sliced
To hold all the blocks, we first create an empty group of Pygame sprites (pygame.sprite.Group()). Because
they were in the sprite group, they were able to all move at the same time at the same pace.
The block (arrow) generation was synced up to the music that was selected. This was done through the librosa
library that analyzed the different frequencies of the music. If it was over a set range, we counted it as a
“beat”. We obtained a list of the times of the music that were rounded to the hundredths second.
Then, to calculate the time that we are able to slash the beats, we had to determine the offset of the time
the block needs to fall to the bottom so that the slashing of the block can be to the beat of the music. The
time that it took for the block to fall to the bottom printed out to be roughly 13.4 seconds. We took the
offset of 13.4, and generated blocks 13.4 seconds before the list. However, because there were so many
beats, we only allowed the block to generate 0.5 seconds after the previous block generation (as it was
generated to the beat).
To test that this worked, we first tried out the block generation and movement on our personal computers for
timing, before making sure it also worked with Raspberry Pi and the PiTFT. We also added a still player
sprite to make sure that it properly appeared on the screen before any hardware controls were added.
IMU and Joystick
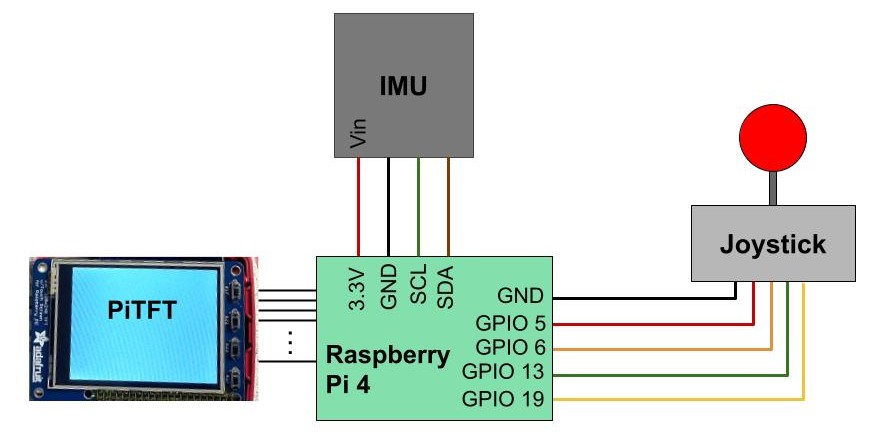
Figure 6. External hardware diagram
After we had a basic display on the PiTFT for our game, we started investigating using the external hardware. The first component we tested was the IMU (TDK InvenSense ICM-20948 9-DoF IMU). We connected the IMU to the Raspberry Pi (through a 40-pin breakout) as shown in the hardware block diagram above so that the data from the IMU can be sent to the Raspberry Pi using I2C (hence the SDA and SCL lines connected). For actually reading data from the IMU, we were able to find a python library. We installed the icm20948 library using the following command:
python3 -m pip install icm20948
This provided us with a simple way to read accelerometer, gyroscope, and magnetometer data from the IMU. We first used example code to see how the values were read in, and then integrated it with the rest of our code. The original plan was to use the accelerometer to detect a “slashing” motion done by the user (who would be holding the IMU in his/her hand). To do so, we decided to use the accelerometer readings (ax, ay, and az, for the acceleration in the x, y, and z axes, respectively) to detect tilting. We used the following equations to calculate the tilt around the x (roll) and y (pitch) axes in degrees. roll = 180 / pi * atan( ay / sqrt(ax^2 + az^2) ) pitch = 180 / pi * atan( ax / sqrt(ay^2 + az^2) ) So, we would say a slash would be when the tilt changes from positive to negative, where the tile is 0 degrees when the IMU is flat. After testing, we discovered that this measurement was only sometimes reliable, and the detection of a slashing motion was not very accurate. So, we decided to switch to using the tilting for side to side movement. Through testing, we found that calculating the roll would give us the tilt angle in that plane. Then, we added the IMU controls to movement of the player cursor. We set it so that if you tilted the IMU within 20 degrees either way, the cursor would stay still. Beyond that, the more you tilt (and thus the larger the value of the roll), the faster the cursor will move in that direction. More specifically, we set it so that between 20 and 40 degrees in either direction, the cursor moves slowly, between 40 and 80 degrees, the cursor moves slightly faster, and between 80 and 90 degrees, the cursor moves the fastest. We again, tested this visually by making sure the cursor moves at the expected speed when tilting the IMU, Next, we investigated the joystick. Since the IMU was changed to be the control for the position of the player cursor, the joystick was now used for the “slashing” of the blocks. Again, we connected the joystick to the Pi as shown in Figure 5. This particular joystick has 4 snap microswitches, corresponding to the four wires connected to the GPIO pins on the Pi. GPIO pin 5 is connected to the switch for a downwards joystick movement, pin 6 is for upwards, pin 13 is for right, and pin 19 is for left. Through testing the joystick in isolation by printing out the reading of each GPIO pin when the stick is moved in some direction, we found that the corresponding line is pulled low when the joystick is moved in that direction. For each of these, we have callback functions to change the cursor direction variable that we store, as well as the last time the joystick has changed directions. The cursor direction is used for setting the image of the cursor sprite, reflecting which way the player has “slashed.” We also use the last time the direction changed to time the length of the “slash” animation before returning the cursor to its base still image. Put together, we decided to mount the IMU on the base of our joystick for easier use. That means that the player simply has to tilt the entire joystick side to side to move the cursor, and can still easily move the stick in the direction they want to slash.
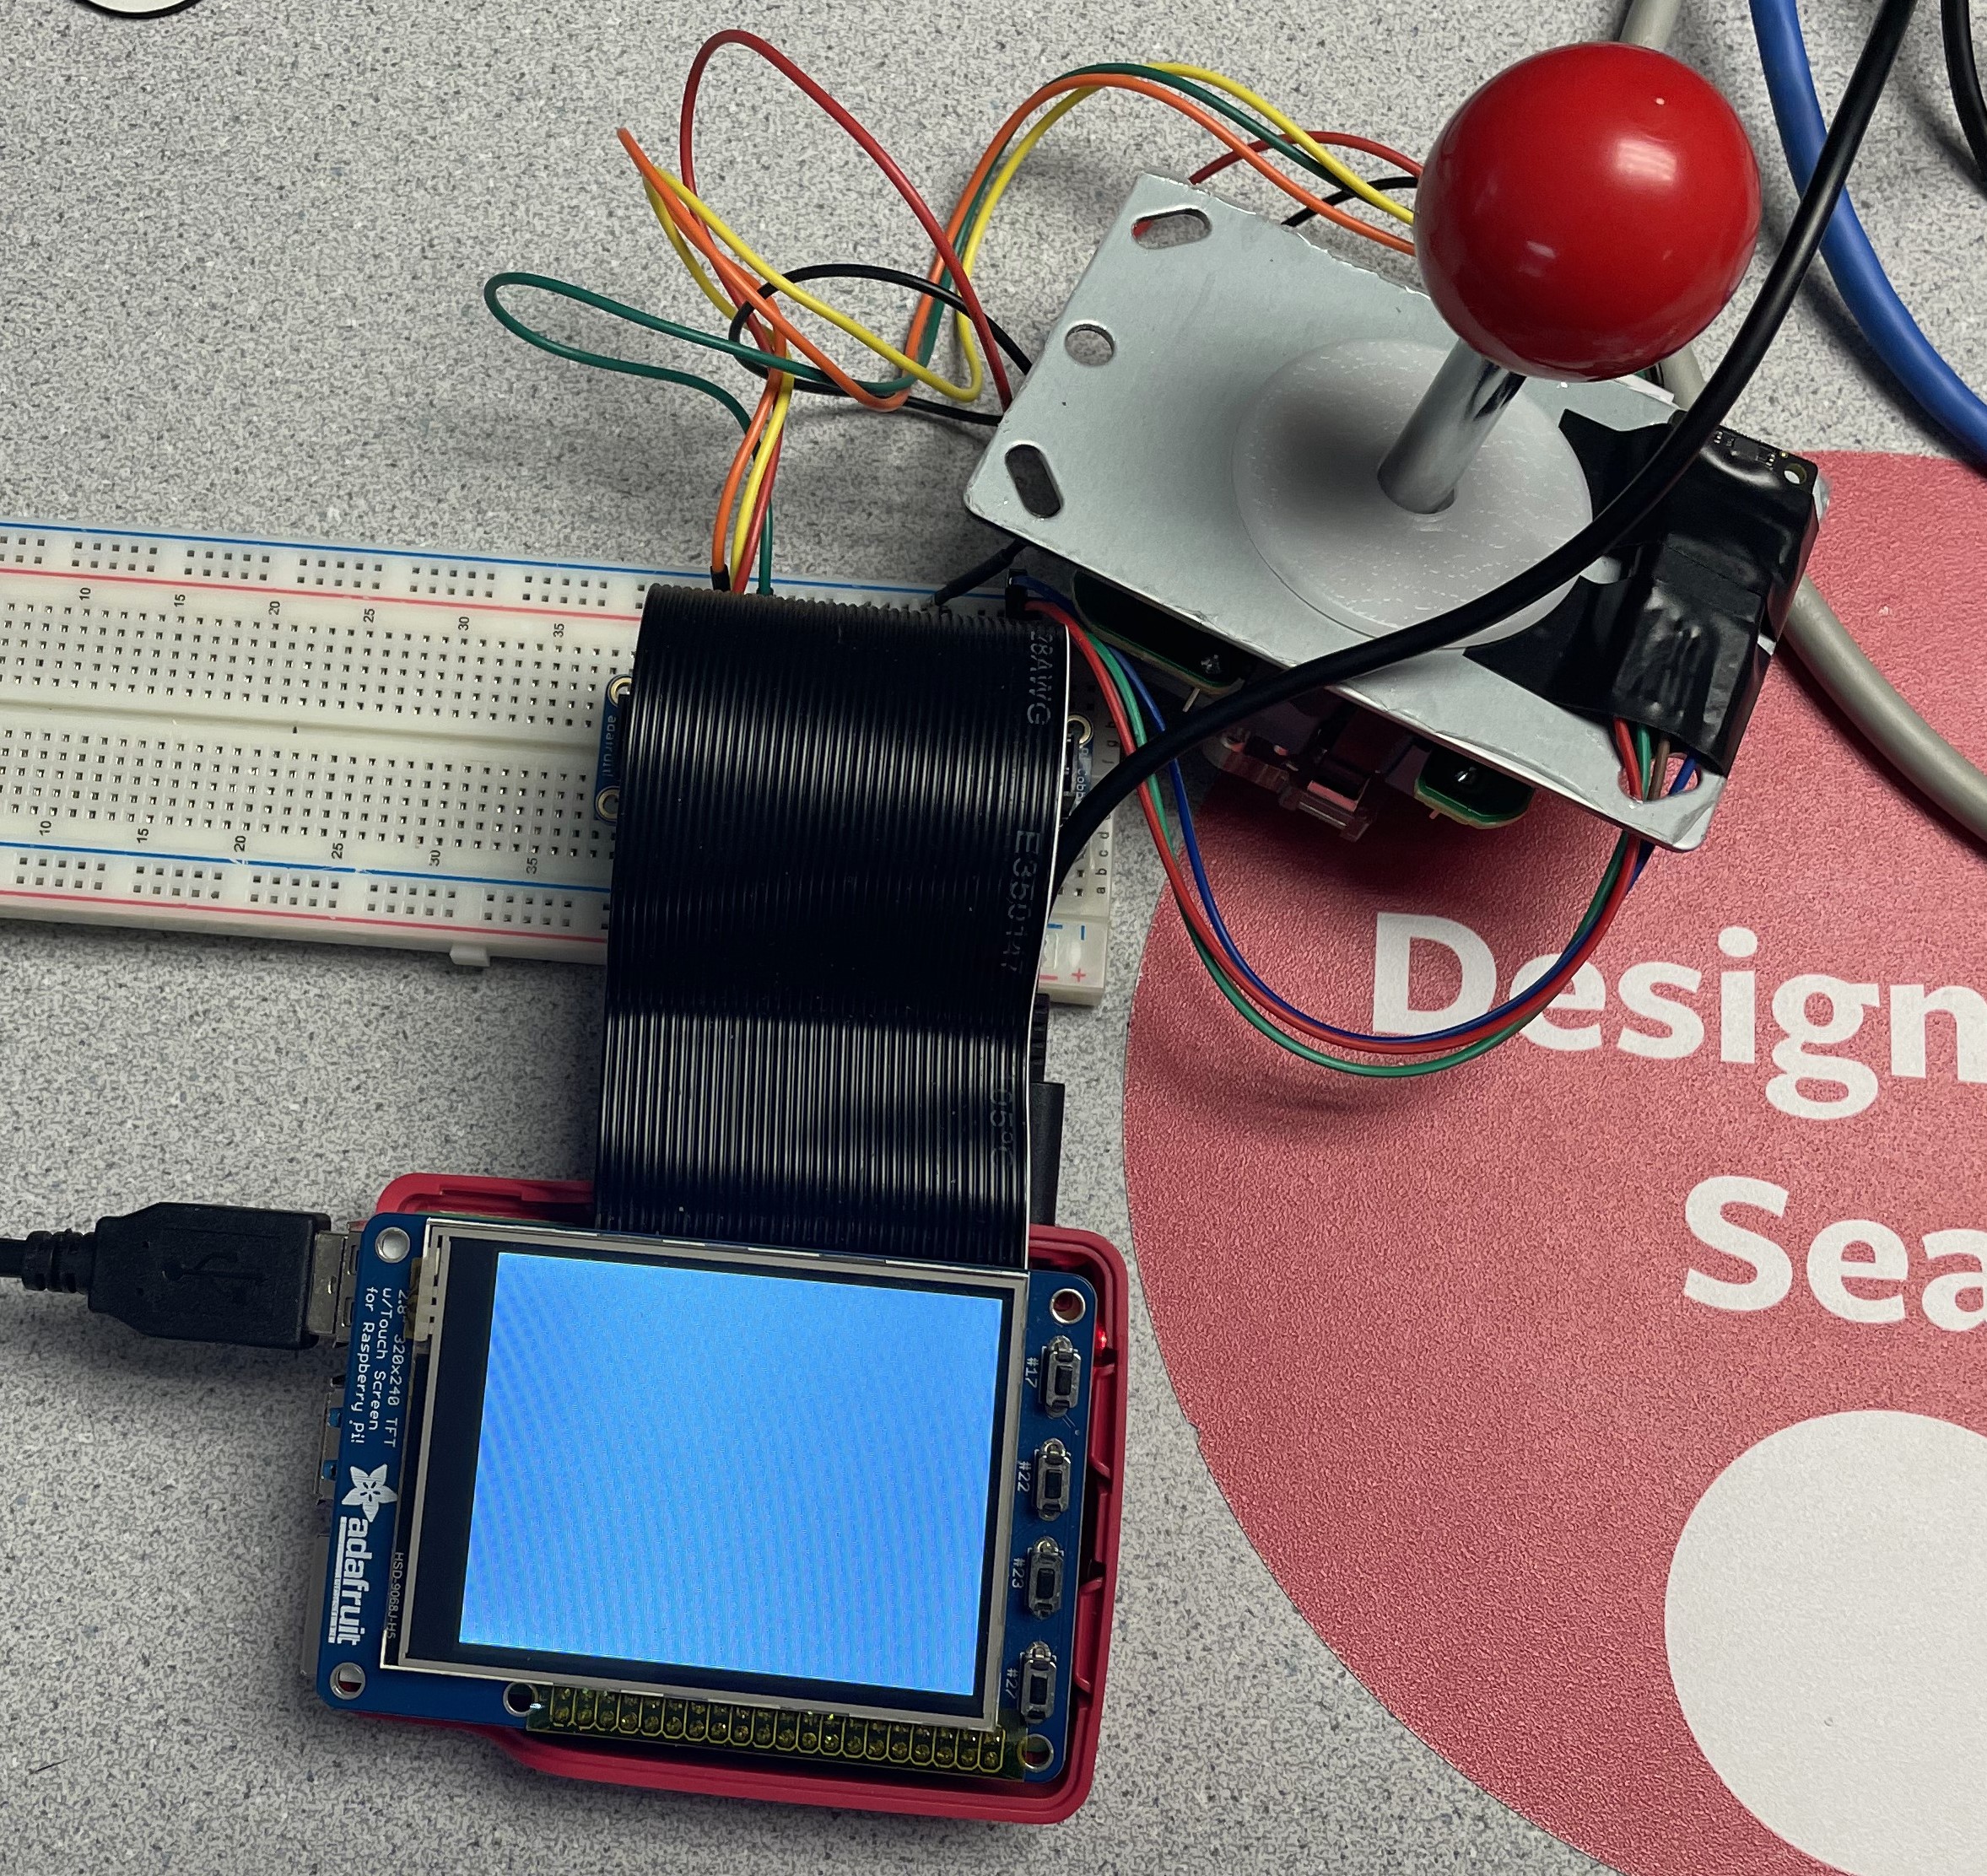
Figure 7. Actual hardware setup; IMU is taped on joystick base
Collisions/Slashing Blocks
With the hardware in place, the next step was to detect when the player correctly slashes a block in the
direction indicated. We detect collisions by checking the distance between the blocks and the cursor. If the x
and y positions are within a certain specified radius, we have a collision. We also make sure to check if the
block has already been sliced so as to not let the user continuously gain points by slicing the same block. If
the cursor and a block are close enough, then we check if the slicing direction matches the direction of the
arrow by checking if the corresponding GPIO pin connected to the joystick is LOW as described above. If there
has truly been a hit, the block is updated with an image that shows it cut in half, and the user earns 10
points. Otherwise, the block and score remain unchanged. If an arrow block falls past a certain threshold
without being cut, we also include an animation (the image for that block sprite changes) where the block
turns
red, indicating a miss. At this point, the block is also deleted from the group of sprites.
To test collisions, we played simplified versions of the game. We first just generated still arrow blocks in
all
four directions to see if using the joystick to slice them in the correct direction works and using the
joystick
to slice them in any other direction doesn’t. Then, we added some arrow block movement back, making sure that
the slicing still worked.
Scoring
In order to provide a comprehensive user experience, we also keep track of score. We maintain a score variable that we update by 10 every time a block is correctly slashed. We display this score in the corner of the RUNNING game screen, as well as in the DONE screen. We reset the score variable whenever we enter the START state. In addition to keeping track of the current score, we also keep track of the highest score that was achieved. Since the two songs have different duration, and thus have two different highest possible scores, we keep track of both of the currently highest scores for each song. Since we keep track of which song just played, we are able to check the appropriate high score when we reach the DONE stage and update it if we beat the current highest score for that song. We display the current high score for the last music selection alongside the score that was just achieved in this stage. To test if the score worked, we played the game multiple times to see if first, the score was increased only once by 10 each time a block was hit, and second to see if the high score was properly updated (higher scores would overwrite the previous high scores, and lower scores have no effect).
Results
In the end, everything did perform as expected. We were able to create an interactive game similar to Beat Saber using a Raspberry Pi 4, PiTFT, IMU, and joystick. There were a few modifications to our project– we initially designed the IMU to be the one detecting slashes instead of the joystick, which would only move up and down. However, we flipped the utility of the two hardware components, which works well since we did not need the cursor to move up and down across the screen, and the slashing motion can be done with the joystick. We also had minor difficulties with having the actual music beat processing library (librosa) installed on the Pi because of installation incompatibilities. So, we ended up processing the music offline and then simply copied the produced list of beat times to our code. Everything else performed as expected, and our team met the goals outlined in the description.
Conclusions
Our project achieved the game that we wanted to create even with modified hardware controls. We think our game is pretty fun to play! We found that using the IMU to detect slashes as well as direction sensing was difficult. This is because to detect “slashes”, we would most likely have to keep track of the positions that the IMU sensor started slashing at, ending location, as well as its direction. This is difficult, and the joystick performs the same function. Additionally, our implementation of the blocks falling with the music is definitely not as in time as in the real game, but we were able to have the user slash blocks to existing beats in the music. Animating the blocks to show slashing on beat is a nontrivial task.
Future Work
If we had more time, we would incorporate more music into the games. Currently, we have to generate timestamps at which the frequency and amplitude of the music are high (which we defined as a beat). This is done separately from the actual game. However, we can theoretically incorporate the user's own music choice to generate the blocks on the spot. Other things that we can explore is to use computer vision to detect slashes rather than a joystick. This would replicate a similar experience to the actual Beat Saber game, which we replaced using a joystick.
Work Distribution
Meet the team!
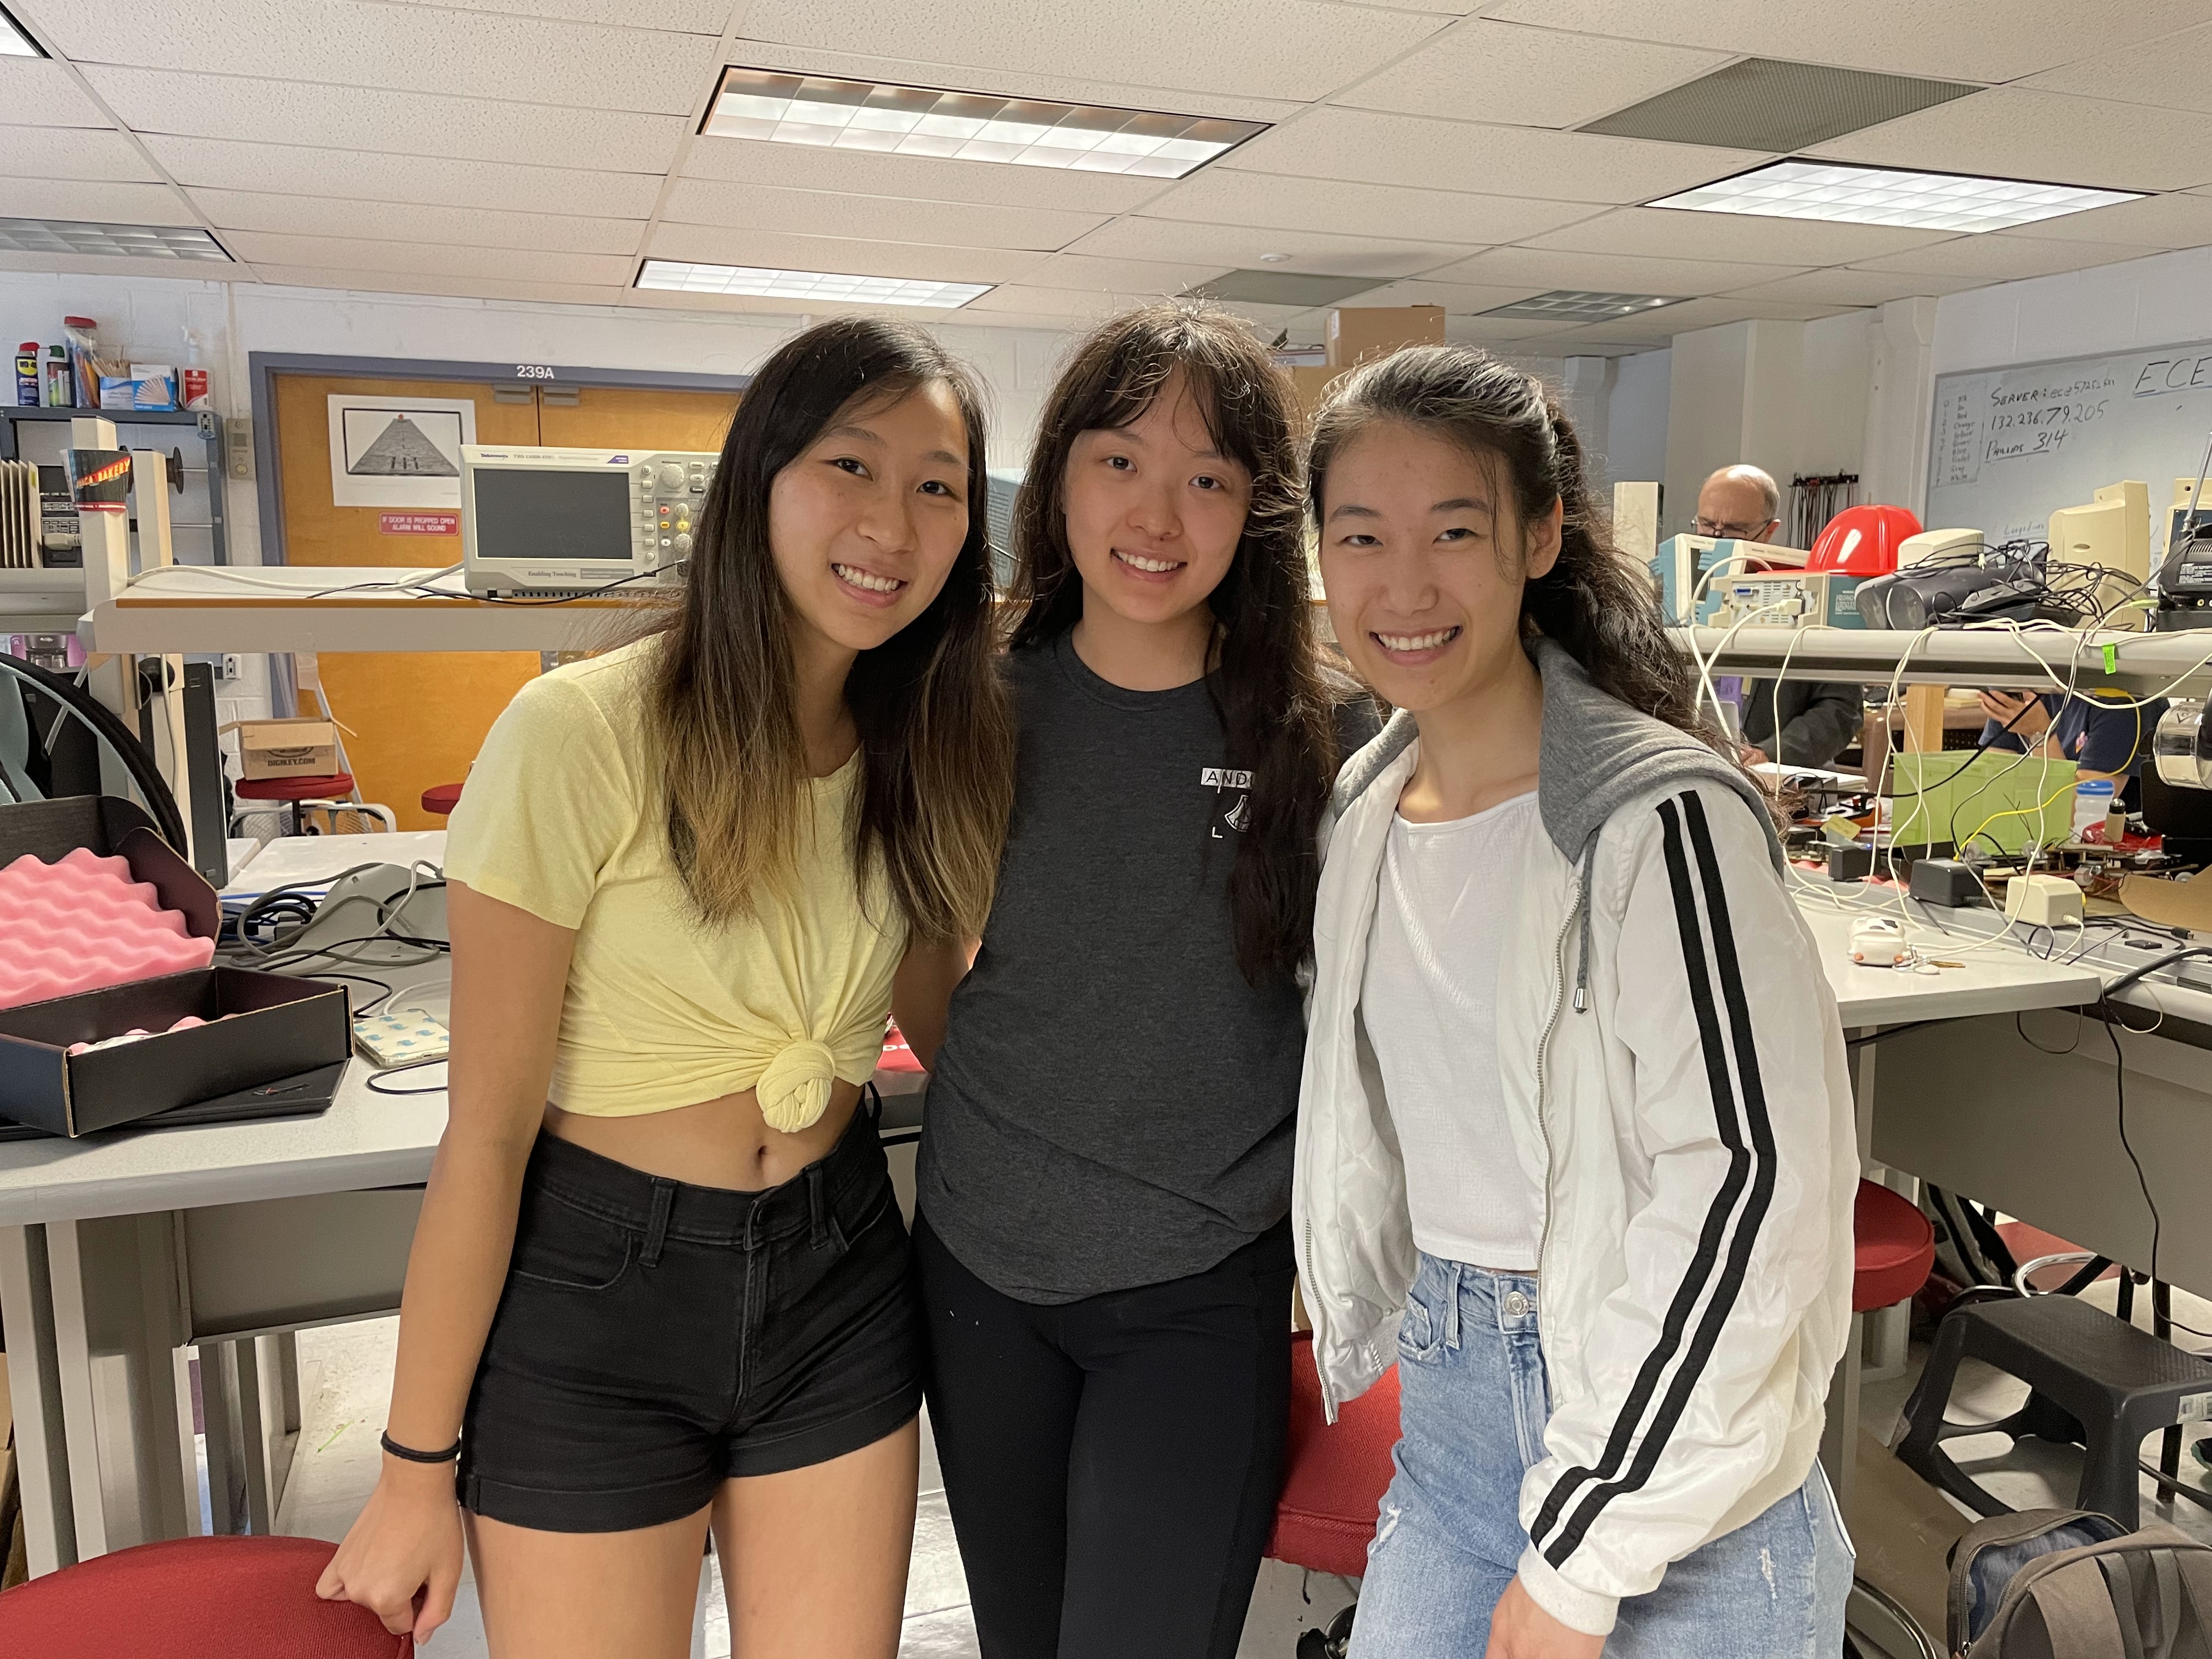
Lauren, Ruby, and Rachel (from left to right)
Lauren
ljs324@cornell.edu
Lauren worked on the UI, game FSM, and general framework for the game, including the different screens and buttons. She also worked on features such as music selection, scoring, and music control.
Ruby
rbm244@cornell.edu
Ruby worked on the cursor class, as well testing and integrating the IMU and joystick. She also contributed to features such as music selection and detecting slashing collisions.
Rachel
sz287@cornell.edu
Rachel reated the arrow class for the creation of the falling blocks. These directions are randomly generated all fall. She also worked with Ruby on detecting collisions between the cursor and the arrows. Lastly, she worked on generating the beats to the music.
Parts List:
From Lab:
- Raspberry Pi 4
- Speakers
- PiTFT
- Breadboard
- Breakout Cable
- 40 pin cable header
Additional Components:
Total: $30.68
References
ECE 5725 Lab 1 and 2 HandoutPython library for IMU: https://github.com/pimoroni/icm20948-python
Roll/Pitch Equations: https://aatishb.com/materials/srr/workshop3.pdf
PixelPowerline Font: https://www.fontspace.com/pixel-powerline-font-f29809
Code Appendix
main.py : main game code (run to play game)
import pygame
from pygame.locals import *
import os
import RPi.GPIO as GPIO
import time
import cursor
from arrow import *
from constants import *
from icm20948 import ICM20948
import math

# set up environment variables for the PiTFT
os.putenv('SDL_VIDEODRIVER','fbcon')
os.putenv('SDL_FBDEV','/dev/fb1')
os.putenv('SDL_MOUSEDRV','TSLIB')
os.putenv('SDL_MOUSEDEV','/dev/input/touchscreen')

# set up GPIO
GPIO.setmode(GPIO.BCM)
GPIO.setup(17, GPIO.IN, pull_up_down = GPIO.PUD_UP)
GPIO.setup(5, GPIO.IN, pull_up_down = GPIO.PUD_UP)
GPIO.setup(6, GPIO.IN, pull_up_down = GPIO.PUD_UP)
GPIO.setup(13, GPIO.IN, pull_up_down = GPIO.PUD_UP)
GPIO.setup(19, GPIO.IN, pull_up_down = GPIO.PUD_UP)

# initialize variables accessed in callbacks
cursor_dir = NONE
slash_time = time.time()


# physical quit button callback
def gpio17_callback(channel):
    global running
    running = False
    for dir in dirs:
        dir.kill()
    if state == 'RUNNING' or state == 'PAUSE':
        os.system('echo "quit" > /home/pi/final_proj/video_fifo')

# callbacks for the joystick inputs
def gpio5_callback(channel):
    global cursor_dir
    global slash_time
    cursor_dir = DOWN
    slash_time = time.time()

def gpio6_callback(channel):
    global cursor_dir
    global slash_time
    cursor_dir = UP
    slash_time = time.time()

def gpio13_callback(channel):
    global cursor_dir
    global slash_time
    cursor_dir = RIGHT
    slash_time = time.time()

def gpio19_callback(channel):
    global cursor_dir
    global slash_time
    cursor_dir = LEFT
    slash_time = time.time()

GPIO.add_event_detect(17, GPIO.FALLING, callback=gpio17_callback, bouncetime=300)
GPIO.add_event_detect(5, GPIO.FALLING, callback=gpio5_callback, bouncetime=300)
GPIO.add_event_detect(6, GPIO.FALLING, callback=gpio6_callback, bouncetime=300)
GPIO.add_event_detect(13, GPIO.FALLING, callback=gpio13_callback, bouncetime=300)
GPIO.add_event_detect(19, GPIO.FALLING, callback=gpio19_callback, bouncetime=300)

# initialize the IMU object
imu = ICM20948()

# possible states: {START, SELECT, RUNNING, DONE, PAUSE}
state = 'START'

# initialize score
score = 0
high_score_1 = 0
high_score_2 = 0

# init PyGame and set up blank screen
pygame.init()
pygame.mouse.set_visible(False)
screen = pygame.display.set_mode(size)
screen.fill(BLACK)

# set pygame font
large_font = pygame.font.Font('PixelPowerline-9xOK.ttf',20)
small_font = pygame.font.Font(None,20)

# set flags
running = True
move = True
my_cursor = None

# create sprite group for arrows
dirs = pygame.sprite.Group()

# initialize timers
last_gen_time = time.time()
last_time = time.time()
start = time.time()
last_runtime = time.time()
runtime = 0
start_time = 0
pause_time = 0

# set song variables
song = 1
beat_times = beat_times_1
dur = dur_1

while running:
    # check if song is almost finished running and transition to DONE state
    if (runtime + time.time()-last_runtime >= dur and state == 'RUNNING'):
        state = 'DONE'
        for dir in dirs:
            dir.kill()
        if song == 1 and score > high_score_1:
            high_score_1 = score
        if song == 2 and score > high_score_2:
            high_score_2 = score
        if running:
            os.system('echo "quit" > /home/pi/final_proj/video_fifo')

    # reset buttons for this state
    buttons = {}

    # calculate IMU roll
    ax, ay, az, gx, gy, gz = imu.read_accelerometer_gyro_data()
    roll = 180*math.atan(ay/math.sqrt(ax*ax+az*az))/math.pi

    screen.fill(BLACK)
    if state == 'START':
        # START state - wait for user to press start
        large_text = large_font.render('Pi Saber', True, WHITE)
        small_text = small_font.render('start', True, WHITE)
        buttons['start'] = (160,200)
    if state == 'SELECT':
        # SELECT state - wait for user to select a song
        large_text = large_font.render('Songs', True, WHITE)
        small_text = small_font.render('start', True, WHITE)
        buttons['song 1'] = (160,170)
        buttons['song 2'] = (160,200)
    if state == 'DONE':
        # DONE state - wait for user to replay the game
        large_text = large_font.render('Game Over', True, WHITE)
        score_text = small_font.render('score: ' + str(score), True, WHITE)
        rect = score_text.get_rect(center=(160,160))
        screen.blit(score_text,rect)
        # display the appropriate high score
        if song == 1:
            high_score_text = small_font.render('song 1 high score: ' + str(high_score_1), True, WHITE)
            rect = high_score_text.get_rect(center=(160,180))
            screen.blit(high_score_text,rect)
        else:
            high_score_text = small_font.render('song 2 high score: ' + str(high_score_2), True, WHITE)
            rect = high_score_text.get_rect(center=(160,180))
            screen.blit(high_score_text,rect)
        small_text = small_font.render('replay', True, WHITE)
        buttons['replay'] = (160,210)
    if state == 'PAUSE':
        # PAUSE state - wait for user to resume or quit the game
        large_text = large_font.render('Game Paused', True, WHITE)
        small_text = small_font.render('resume', True, WHITE)
        buttons['resume'] = (160,180)
        buttons['quit'] = (160,210)
    if state != 'RUNNING':
        # display large text in all states except for RUNNING
        rect = large_text.get_rect(center=(160,120))
        screen.blit(large_text,rect)


    else:
        # main game play state
        score_text = small_font.render('score: ' + str(score), True, WHITE)
        rect = score_text.get_rect(center=(30,10))
        screen.blit(score_text,rect)
        buttons['pause'] = (300,10)

        # make arrows fall to beat times
        cur_time = time.time()
        time_stamp = round(time.time() - start + fall_time, 2)
        if time.time() - last_gen_time > 2:
            if time_stamp in beat_times:
                last_gen_time = time.time()
                arrow = GetDirArrow()
                dirs.add(arrow)

        # move the cursor based on the roll
        if(roll > 20):
            if my_cursor.x < 320:
                my_cursor.x += 1 * (roll // 40 + 1)
                cursor_dir = RIGHT
            else:
                my_cursor.x = 320

        elif(roll < -20):
            if my_cursor.x > 0:
                my_cursor.x -= 1 * ((-1*roll) // 40 + 1)
                cursor_dir = LEFT
            else:
                my_cursor.x = 0

        # animate the cursor movement
        elif (time.time() - slash_time) > 0.25:
            cursor_dir = NONE

        if cur_time - last_time > 0.25:
            move = True
            last_time = time.time()
        else:
            move = False

        # set cursor image:
        my_cursor.set_dir(cursor_dir)

        # check for slashs with arrows
        for dir in dirs:
            if move:
                dir.arrow_move(speed)
            x_collide = abs(dir.rect.x - my_cursor.x) < RADIUS
            y_collide = abs(dir.rect.y - my_cursor.y) < RADIUS

            if x_collide and y_collide and not dir.hit:
                if dir.key == UP:
                    if not GPIO.input(6):
                        dir.arrow_hit()
                        score += 10

                if dir.key == DOWN:
                    if not GPIO.input(5):
                        dir.arrow_hit()
                        score += 10

                if dir.key == LEFT:
                    if not GPIO.input(19):
                        dir.arrow_hit()
                        score += 10

                if dir.key == RIGHT:
                    if not GPIO.input(13):
                        dir.arrow_hit()
                        score += 10
            # display arrow
            screen.blit(dir.image, dir.rect)

        # draw cursor
        my_cursor.draw(screen)

    # display buttons
    button_rects = {}
    for text,pos in buttons.items():
        small_text = small_font.render(text, True, WHITE)
        rect = small_text.get_rect(center=pos)
        button_rects[text] = rect
        screen.blit(small_text,rect)

    # check for button touches on the touchscreen
    for event in pygame.event.get():
        if(event.type is MOUSEBUTTONDOWN):
            pos = pygame.mouse.get_pos()
        elif(event.type is MOUSEBUTTONUP):
            pos = pygame.mouse.get_pos()
            x,y = pos
            for text,rect in button_rects.items():
                if rect.collidepoint(pos):
                    # change state based on button presses
                    if text == 'start':
                        state = 'SELECT'
                    elif text == 'replay':
                        state = 'START'
                        for dir in dirs:
                            dir.kill()
                    elif text == 'resume':
                        state = 'RUNNING'
                        last_runtime = time.time()
                        os.system('echo "pause" > /home/pi/final_proj/video_fifo')
                        start = start + time.time() - pause_time
                    elif text == 'pause':
                        pause_time = time.time()
                        state = 'PAUSE'
                        runtime = runtime + time.time()-last_runtime
                        os.system('echo "pause" > /home/pi/final_proj/video_fifo')
                    elif text == 'quit':
                        state = 'START'
                        for dir in dirs:
                            dir.kill()
                        os.system('echo "quit" > /home/pi/final_proj/video_fifo')
                    elif text == 'song 1':
                        beat_times = beat_times_1
                        dur = dur_1
                        song = 1
                        state = 'RUNNING'
                        my_cursor = cursor.Cursor(160,200)
                        start_time = time.time()
                        start = time.time()
                        last_runtime = time.time()
                        runtime = 0
                        score = 0
                        os.system('mplayer -input file=/home/pi/final_proj/video_fifo electronic-rock-king-around-here-15045.mp3 &')
                    elif text == 'song 2':
                        beat_times = beat_times_2
                        dur = dur_2
                        song = 2
                        state = 'RUNNING'
                        my_cursor = cursor.Cursor(160,200)
                        start_time = time.time()
                        start = time.time()
                        last_runtime = time.time()
                        runtime = 0
                        score = 0
                        os.system('mplayer -input file=/home/pi/final_proj/video_fifo the-future-bass-15017.mp3 &')

    pygame.display.flip()

GPIO.cleanup()
arrow.py : arrow block class
import os
from tkinter import Widget
import random
import pygame
from pygame.locals import *
from constants import *


images = [pygame.image.load('directions/left.png'),
          pygame.image.load('directions/right.png'),
          pygame.image.load('directions/up.png'),
          pygame.image.load('directions/down.png')]

missed_img = pygame.image.load('directions/hit.png')

hit_images = [pygame.image.load('cut_half/left.jpg'),
              pygame.image.load('cut_half/right.jpg'),
              pygame.image.load('cut_half/up.jpg'),
              pygame.image.load('cut_half/down.jpg')]

class Arrow(pygame.sprite.Sprite):
    def __init__(self, image_key):
        super(Arrow, self).__init__()
        # print("genreating arrow", image_key)
        self.key = image_key
        img = images[image_key]
        self.image = pygame.transform.scale(img, (20, 20))

        self.hit = False
        self.rect = self.image.get_rect()
        self.rect.y = 0 #starting low for testing purposes
        self.rect.x = random.randrange(0+20, width-20)

    def arrow_move(self, speed):
        self.rect = self.rect.move(speed)
        if self.rect.bottom > 235 and not self.hit:
            self.image = pygame.transform.scale(missed_img, (20, 20))
        elif self.rect.bottom > height:
            self.kill()

    def arrow_hit(self):
        self.hit = True
        self.image = pygame.transform.scale(hit_images[self.key], (35, 35))


def GetDirArrow():
    image_key = random.randint(0, 3)
    return Arrow(image_key)
cursor.py : cursor class
import pygame

PLAYER_WIDTH=20

cursor_images = [pygame.image.load('cursor/cursor_l.png'),
                 pygame.image.load('cursor/cursor_r.png'),
                 pygame.image.load('cursor/cursor_u.png'),
                 pygame.image.load('cursor/cursor_d.png'),
                 pygame.image.load('cursor/cursor.png'),]


class Cursor(object):
    """cursor object"""

    def __init__(self,x,y):
        """
        param x: x position of center
        param y: y position of center
        """
        self.x=x
        self.y = y
        self.image = pygame.transform.scale(pygame.image.load('cursor/cursor.png'), (PLAYER_WIDTH,PLAYER_WIDTH))

        self.rect = self.image.get_rect()

    def draw(self, screen):
        screen.blit(self.image, (self.x-PLAYER_WIDTH/2,self.y-PLAYER_WIDTH/2))

    def set_dir(self, direction):
        self.image = pygame.transform.scale(cursor_images[direction], (PLAYER_WIDTH+10,PLAYER_WIDTH+10))
constants.py : collection of referenced game constants
WHITE = 255,255,255
BLACK = 0,0,0
size = width, height = 320,240
speed = [0, 4]
LEFT = 0
RIGHT = 1
UP = 2
DOWN = 3
NONE = 4

RADIUS = 20
fall_time = 13.5
beat_times_1 = [0.51, 0.95, 1.39, 1.81, 2.25, 2.67, 3.09, 3.53, 3.97, 4.39, 4.81, 5.22, 5.67, 6.11, 6.52, 6.94, 7.38, 7.8, 8.24, 8.66, 9.1, 9.54, 9.96, 10.38, 10.82, 11.24, 11.68, 12.1, 12.54, 12.96, 13.37, 13.82, 14.26, 14.68, 15.09, 15.53, 16.02, 16.53, 17.02, 17.51, 17.95, 18.39, 18.81, 19.23, 19.67, 20.15, 20.67, 21.11, 21.66, 22.13, 22.66, 23.08, 23.5, 23.94, 24.36, 24.8, 25.22, 25.66, 26.08, 26.52, 26.94, 27.38, 27.82, 28.24, 28.65, 29.09, 29.51, 29.95, 30.37, 30.81, 31.23, 31.67, 32.11, 32.53, 32.95, 33.39, 33.83, 34.27, 34.69, 35.11, 35.55, 35.97, 36.39, 36.8, 37.24, 37.66, 38.08, 38.52, 38.96, 39.38, 39.8, 40.24, 40.73, 41.22, 41.68, 42.1, 42.52, 42.96, 43.4, 43.82, 44.26, 44.68, 45.09, 45.53, 45.95, 46.37, 46.81, 47.25, 47.67, 48.09, 48.53, 48.95, 49.39, 49.81, 50.25, 50.67, 51.11, 51.53, 51.97, 52.38, 52.83, 53.24, 53.68, 54.1, 54.54, 54.96, 55.4, 55.82, 56.24, 56.66, 57.1, 57.52, 57.96, 58.37, 58.82, 59.23, 59.68, 60.09, 60.53, 60.95, 61.39, 61.81, 62.25, 62.67, 63.11, 63.53, 63.95, 64.39, 64.81, 65.22, 65.67, 66.11, 66.53, 66.94, 67.38, 67.83, 68.24, 68.66, 69.1, 69.52, 69.96, 70.38, 70.82, 71.24, 71.68, 72.1, 72.54, 72.96, 73.38, 73.82, 74.33, 74.84, 75.3, 75.79, 76.23, 76.67, 77.09, 77.51, 77.95, 78.46, 78.95, 79.39, 79.95, 80.41, 80.94, 81.36, 81.78, 82.22, 82.64, 83.1, 83.55, 83.96, 84.38, 84.8, 85.24, 85.66, 86.1, 86.54, 86.96, 87.38, 87.79, 88.24, 88.65, 89.09, 89.51, 89.95, 90.4, 90.81, 91.23, 91.67, 92.16, 92.65, 93.11, 93.67, 94.11, 94.55, 94.99, 95.41, 95.9, 96.36, 96.8, 97.25, 97.66, 98.1, 98.55, 99.03, 99.52, 99.96, 100.38, 100.8, 101.24, 101.68, 102.1, 102.52, 102.96]
beat_times_2 = [0.51, 0.95, 1.39, 1.81, 2.25, 2.67, 3.09, 3.53, 3.97, 4.39, 4.81, 5.22, 5.67, 6.11, 6.52, 6.94, 7.38, 7.8, 8.24, 8.66, 9.1, 9.54, 9.96, 10.38, 10.82, 11.24, 11.68, 12.1, 12.54, 12.96, 13.37, 13.82, 14.26, 14.68, 15.09, 15.53, 16.02, 16.53, 17.02, 17.51, 17.95, 18.39, 18.81, 19.23, 19.67, 20.15, 20.67, 21.11, 21.66, 22.13, 22.66, 23.08, 23.5, 23.94, 24.36, 24.8, 25.22, 25.66, 26.08, 26.52, 26.94, 27.38, 27.82, 28.24, 28.65, 29.09, 29.51, 29.95, 30.37, 30.81, 31.23, 31.67, 32.11, 32.53, 32.95, 33.39, 33.83, 34.27, 34.69, 35.11, 35.55, 35.97, 36.39, 36.8, 37.24, 37.66, 38.08, 38.52, 38.96, 39.38, 39.8, 40.24, 40.73, 41.22, 41.68, 42.1, 42.52, 42.96, 43.4, 43.82, 44.26, 44.68, 45.09, 45.53, 45.95, 46.37, 46.81, 47.25, 47.67, 48.09, 48.53, 48.95, 49.39, 49.81, 50.25, 50.67, 51.11, 51.53, 51.97, 52.38, 52.83, 53.24, 53.68, 54.1, 54.54, 54.96, 55.4, 55.82, 56.24, 56.66, 57.1, 57.52, 57.96, 58.37, 58.82, 59.23, 59.68, 60.09, 60.53, 60.95, 61.39, 61.81, 62.25, 62.67, 63.11, 63.53, 63.95, 64.39, 64.81, 65.22, 65.67, 66.11, 66.53, 66.94, 67.38, 67.83, 68.24, 68.66, 69.1, 69.52, 69.96, 70.38, 70.82, 71.24, 71.68, 72.1, 72.54, 72.96, 73.38, 73.82, 74.33, 74.84, 75.3, 75.79, 76.23, 76.67, 77.09, 77.51, 77.95, 78.46, 78.95, 79.39, 79.95, 80.41, 80.94, 81.36, 81.78, 82.22, 82.64, 83.1, 83.55, 83.96, 84.38, 84.8, 85.24, 85.66, 86.1, 86.54, 86.96, 87.38, 87.79, 88.24, 88.65, 89.09, 89.51, 89.95, 90.4, 90.81, 91.23, 91.67, 92.16, 92.65, 93.11, 93.67, 94.11, 94.55, 94.99, 95.41, 95.9, 96.36, 96.8, 97.25, 97.66, 98.1, 98.55, 99.03, 99.52, 99.96, 100.38, 100.8, 101.24, 101.68, 102.1, 102.52, 102.96]

dur_1 = 105
dur_2 = 134
music_beats.py : used locally to generate beat times for music
import librosa


x, sr = librosa.load('electronic-rock-king-around-here.mp3')


tempo, beat_frames = librosa.beat.beat_track(
    x, sr=sr)

beat_times = librosa.frames_to_time(beat_frames, sr=sr)
beat_times = [round(elem, 2) for elem in beat_times]
# print(beat_times)